Telemetrix4Arduino
Installation Instructions
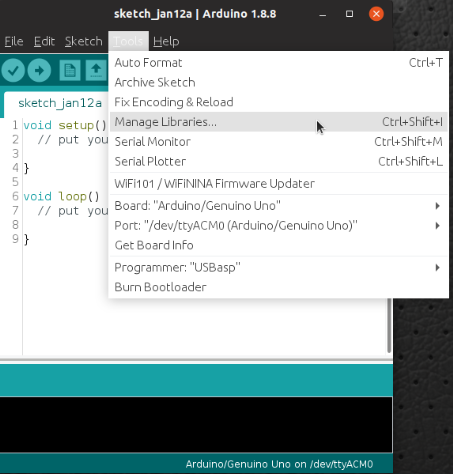
1. Open the Arduino IDE and select Tools/Manage Libraries.
2. Enter "Telemetrix4Arduino in the search box.

3. Click on the Install button. You will be prompted to allow the installation of additional libraries. Accept the installation for all.
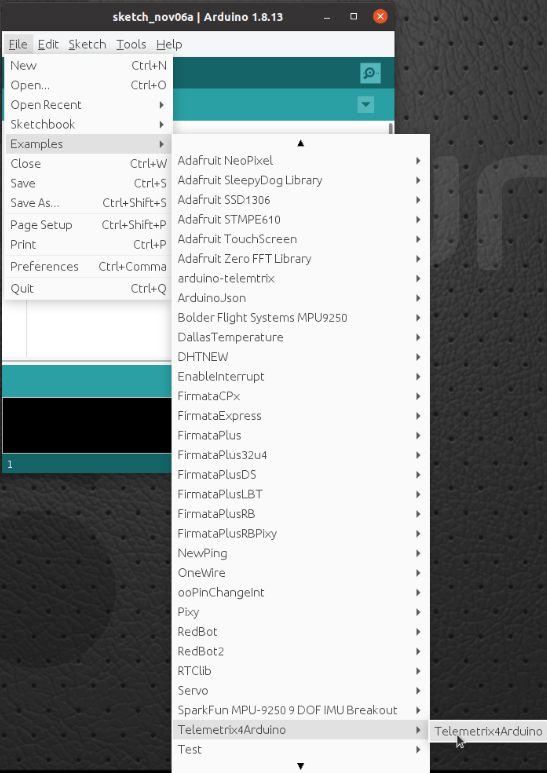
4. Upload Telemetrix4Arduino to your Arduino-Core board by selecting File/Examples/Telemetrix4Arduino/Telemetrix4Arduino and then clicking the upload button on the IDE.
Setting The Telemetrix4Arduino Instance ID
Telemetrix4Arduino, in conjunction with the Telemetrix Project clients, associates a specific Arduino board with your application.
If you only have a single Arduino connected at a time, you do not need to do anything. However, if you wish to run multiple Arduinos, you must assign each one a unique ID number.
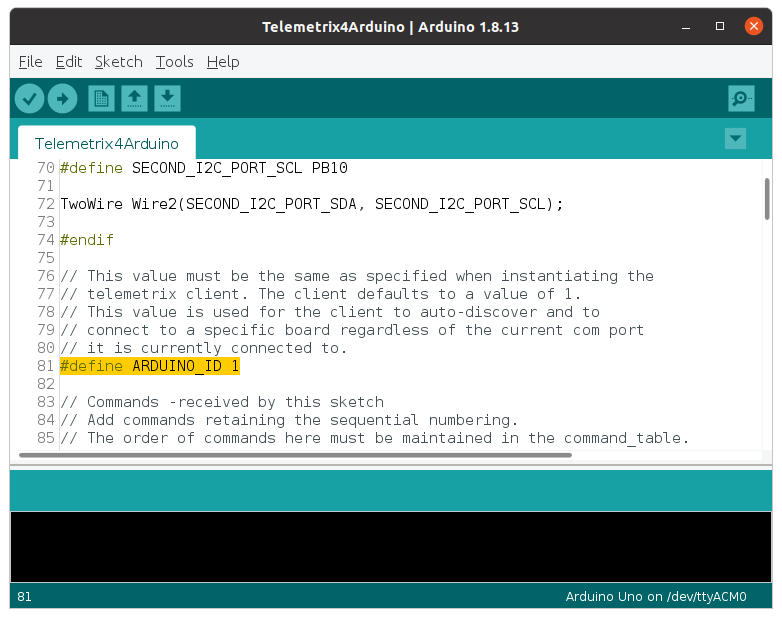
If you wish to change the server's instance_id, you must edit the sketch code and upload the changes to the Arduino.
To match the instance_id on the client side, you will need to specify the arduino_instance id parameter when instantiating the client class:
def __init__(self, com_port=None, arduino_instance_id=1,
                 arduino_wait=4, sleep_tune=0.000001,
                 shutdown_on_exception=True)
If you use multiple Arduino boards for your application, you must specify the com_port and arduino_id for each telemetrix instance. For example, for telemetrix:
board = telemetrix.Telemetrix(com_port='/dev/ttyACM0', arduino_instance_id=1)
board2 = telemetrix.Telemetrix(com_port='/dev/ttyACM1', arduino_instance_id=2)
For telemetrix-aio:
board = telemetrix_aio.TelemetrixAIO(com_port='/dev/ttyACM0', arduino_instance_id=1)
board2 = telemetrix_aio.TelemetrixAIO(com_port='/dev/ttyACM1', arduino_instance_id=2)
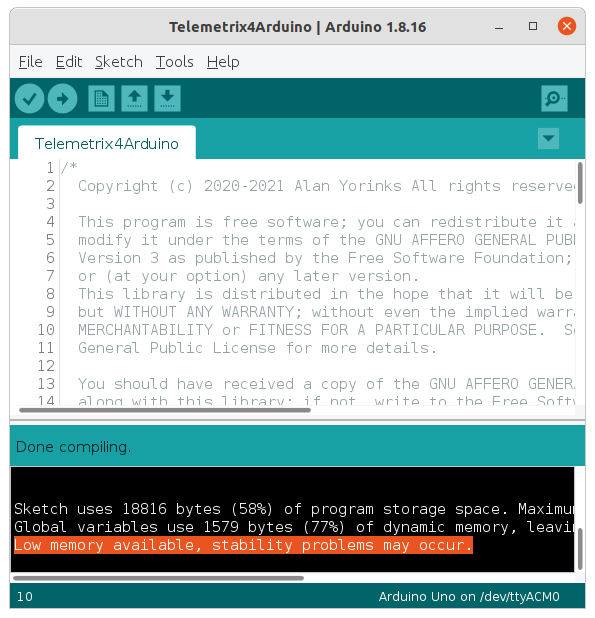
NOTE: If you use an Arduino Uno, you may see a warning in the Arduino IDE after compiling. You may ignore this warning.