ESP-8266 NodeMCU Installation Instructions
The Arduino IDE is used to install the required software onto the ESP-8266.
Installing The Arduino IDE
If you need to install the Arduino IDE on your computer, go to the Arduino Download page and download and install the IDE for your computer.
Configuring The Boards Manager
The Arduino IDE boards manager needs to be configured to use the ESP-8266 Arduino Core. The procedure is found on this page.
Install The Telemetrix4ESP8266 Sketch
To install the Telemetrix4ESP8266 sketch, from the Arduino IDE main menu, open Tools/Manage Libraries...
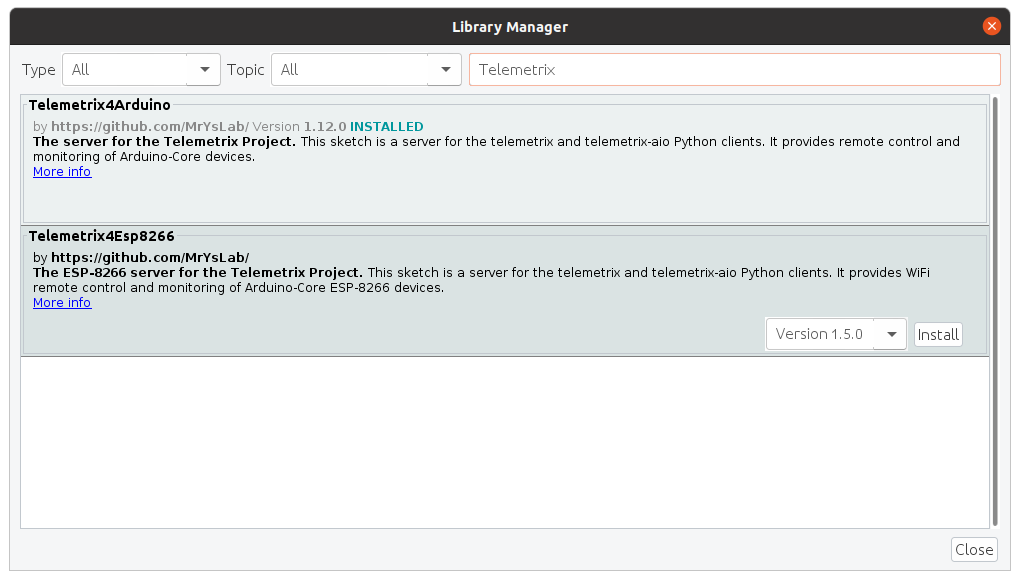
In the search edit box, enter Telemetrix.
Select Telemetrix4ESP8266 and press the Install button.
After the installation is complete, from the Arduino main menu, select File/Examples/TelemetrixEsp8266/TelemetrixEsp8266. The source code for the sketch will appear in the Editor window.
Configure Your Network Values In the Sketch
The sketch needs to be modified to contain your network SSID and password.
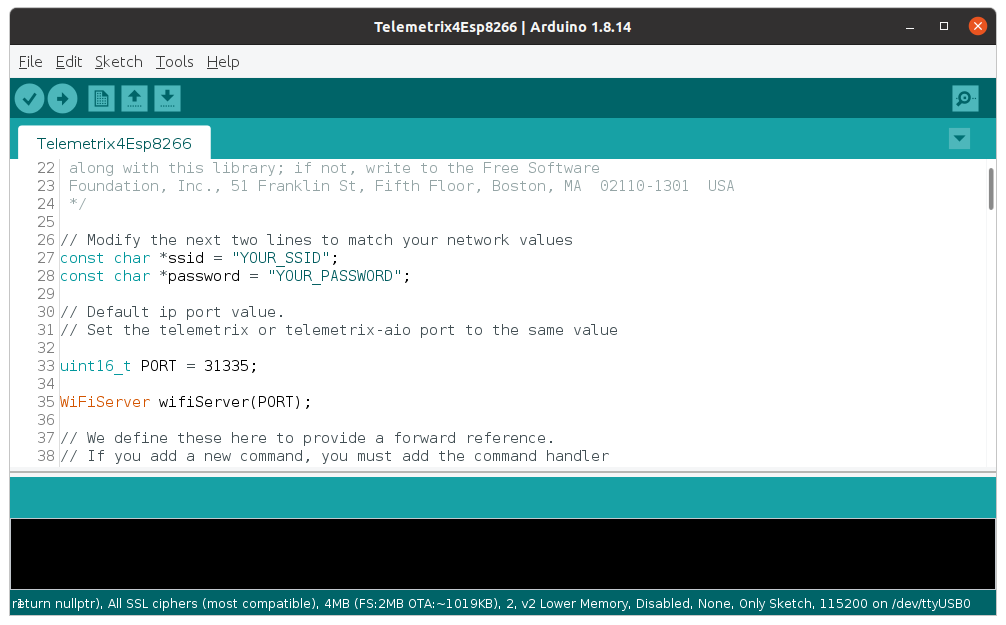
Replace "YOUR SSID" and "YOUR PASSWORD" with the values for your network. Make sure that double quotes are still in place for both values.
Save the sketch.
Upload The Sketch To the ESP-8266
To upload the sketch to the NodeMCU, plug a USB cable into the NodeMCU and your computer, and from the Arduino IDE main menu Tools selection, choose Board/Esp8266 Boards and from that menu, select the board you are using. In my case, I am using a NodeMCU 1.0. Next, select the Com port from the Tools/Port menu of the Arduino IDE.
Now, click on the Upload arrow (the horizontal arrow) below the Arduino IDE Main menu, and the sketch will take several seconds to compile and load.
Determine The IP Address Assigned To The ESP-8266
To determine the IP address assigned to the NodeMCU, open the Arduino IDE Serial Monitor (the button in the upper right of the Arduino IDE), set the speed to 115200, press the reset button on the NodeMCU. Within 15 seconds, you should see a message telling you the IP address of the NodeMCU. Write this value down since you will need it later when using the Scratch3 Editor.
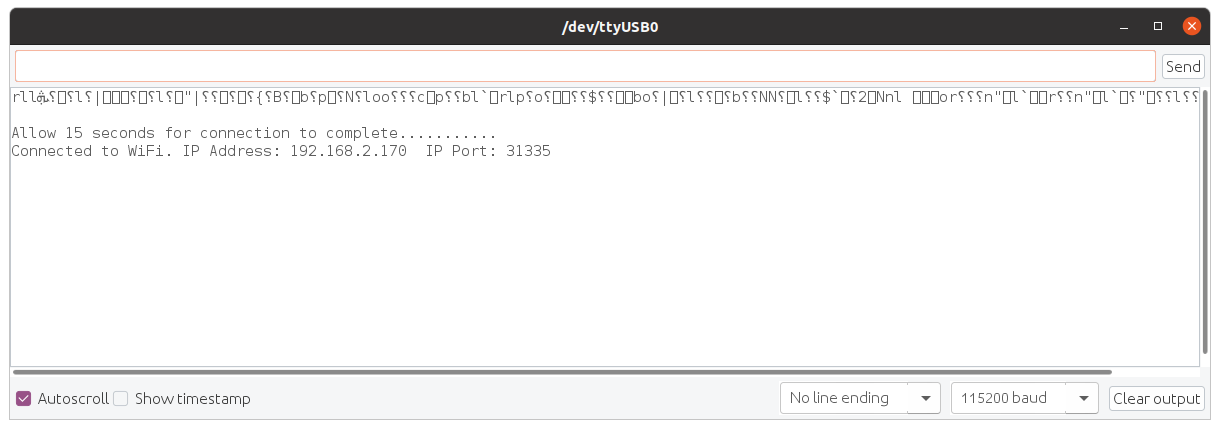
NOTE: When you reset the NodeMCU, the onboard LED will stay lit until a connection is made with your router. You must wait for the LED to extinguish before starting the s3e script.