CONSTRUCTION
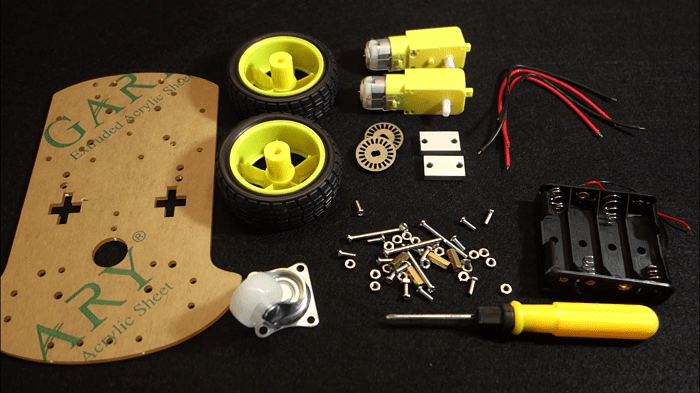
A List Of Components
Other than the pair of micro:bit computers, Kitronik motor board and the Sharp Digital Distance sensor, feel free to use any parts or construction practices you wish. Many of these parts came from my hardware "goodie box" and if you have your own parts on hand, I encourage you to use them to personalize your robot.
| Quantity | Component | Cost (USD) |
|---|---|---|
| 2 | micro:bit computers | $30.00 |
| 1 | robot chassis and motors | $14.00 |
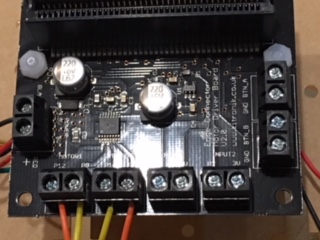
| 1 | Kitronik micro:bit motor board | $15.00 |
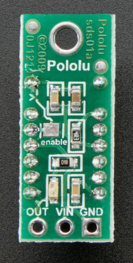
| 1 | Sharp GP2Y0D810Z0F Digital Distance Sensor with Pololu Carrier | $7.00 |
| 4 | AA Batteries | $1.00 |
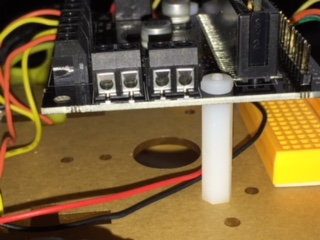
| 1 | Nylon Mounting Hardware | $6.50 |
| 1 | Tiny Breadboard | $4.00 |
| 1 | Male to female jumper wires | $4.00 |
| 1 | Breakaway male header pins | $5.00 |
Assembly
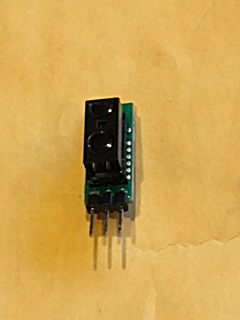
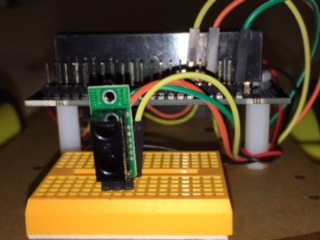
7. Place the digital distance sensor in the breadboard.
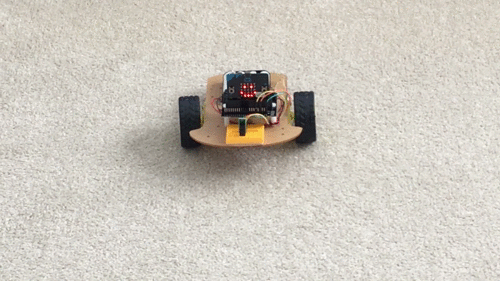
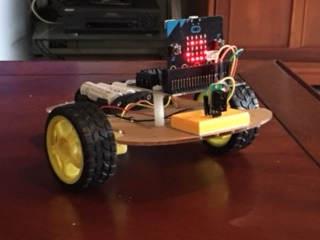
10. Your robot is now ready for a software load!
CODING THE ROBOT
A Note On Minifying Code
All micro:bit MicroPython files for this project are supplied in 2 formats, a fully commented format and a "minified" format. The minified format removes all comments and unnecessary white space. The micro:bit has limited resources, so we want to maximize every bit of space we can for useful executable code. To do this, we "minify" the fully commented file using pyminifier.
The pyminifier utility can be installed on your computer using pip.
For Windows:
pip install pyminifer
For Linux/Mac:
sudo pip3 install pyminifer
Once installed, it's easy to use. Pyminifier accepts an input file and creates a minified version, leaving the original file intact.
Here is a sample of a fully commented file, called min_ex.py.
# This is a demo file to illustrate using the pyminifier utility.
# Usage of pyminifier with this file:
#    pyminifier -o min_ex_min.py mix_ex.py

def some_function(a, b, c):
    """
    This is a sample function with three input parameters
    :param a: input 1
    :param b: input 2
    :param c: input 3
    :return: the result of adding a+b+c
    """
    sum = a + b + c
    return sum
To minify this file, open a command/terminal window, then type the following command:
pyminifier -o min_ex_min.py min_ex.py
The -o option specifies the name of the minified file, and the last parameter is the name of the source file to minify.
This will create a new file called min_ex_min.py while leaving min_ex.py intact.
Here is the result:
def some_function(a,b,c):
 sum=a+b+c
 return sum
So after running this command, we still have our original file to refer to and maintain, and a minified, stripped down version, to flash to the micro:bit
Using 3rd Party Libraries With micro:bit MicroPython
In Python, to utilize a 3rd party module or library, we normally install it using a tool like pip, and then add an import statement to our source file to include the library in our project.
For the micro:bit, things work a bit differently. You can still use an import statement if you wish, but the the procedure to do so is somewhat cumbersome. A simpler and more straight forward approach is to simply copy the library source code to the top of your application source file and then add your code below it.
For the robot, we are going to take advantage of the kitronik_motor_board library to provide motor control.
If you look at microbit_robot.py, you will see the KMotor class at the top of the file. This class is the source for the kitronik_motor_board library that was copied and pasted into our file.
The kitronik_motor_board Library
You can read the full API documentation for the kitronik_motor_board library on the GitHub web page, but in a nutshell, it provides a simple API for motor control that allows one to select a motor and turn it on in either the forward or reverse direction, or place it in a hard brake or coast state.
The microbit_robot Source Code
The Robot class provides both robot control and an interface to the outside world using the micro:bit radio.
Let's take a look at this class in a little more detail.
The __init__ method first creates an instance of the KMotor library class. It then displays a "HAPPY" image on the micro:bit display to let us know that the robot is "alive".
class Robot:
    """
    This class runs a simple 2 wheel/2motor robot.
    It listens for commands over the radio interface
    and dispatches the method associated with the command.

    It also monitors the Sharp GP2Y0D810Z0F Digital Distance Sensor
    for objects that are in front of the robot
    """

    def __init__(self):
        """
        Instantiate an instance of KMotor.
        Display a "smile" to let the use know that upon
        first power up, we are alive.
        Create a dispatch table for each radio command.
        Turn on the radio and wait for commands to come in.
        """

        # instantiate a motor object
        self.km = KMotor()

        # display something so that we know the board is
        # alive
        display.show(Image.HAPPY)
Next, a "dispatch dictionary" is constructed to help find and execute each command that is received over the micro:bit radio interface. The radio interface is then enabled:
        # build a dispatch dictionary to allow us
        # to quickly execute each incoming command
        self.dispatch = {'fwd': self.go_forward,
                         'rev': self.go_reverse,
                         'left': self.go_left,
                         'right': self.go_right,
                         'spin_right': self.spin_right,
                         'spin_left': self.spin_left,
                         'stop': self.stop,
                         }
        # turn on the micro:bit radio so that we can receive commands.
        radio.on()
We then go into the event loop. First the loop checks the distance sensor to see if the robot needs to take evasive action. The sensor returns a digital 0 when something is near, and has the robot reverse direction for 1 second, turn right for 1 second and then turns the motors off when the robot is in range of an obstacle.
The loop continues and checks to see if a command has been received over the radio interface. If a command is available, its associated method is retrieved from the the dispatch table and is executed:
        while True:
            # check to see if we need to perform an avoidance maneuver.
            # when an object is near, the distance sensor returns a digital 0.
            # if a crash is imminent, reverse and go right
            if not pin15.read_digital():
                self.go_reverse()
                sleep(1000)
                self.go_right()
                sleep(1000)
                self.stop()

            # get next command
            cmd = radio.receive()
            if cmd is None:
                pass
            else:
                # move motors based on command
                # fetch command from command table
                op = self.dispatch.get(cmd, None)
                # if a command has been fetched, execute it
                if op:
                    op()
The motion command methods follow next:
    # motion command handlers
    def go_forward(self):
        display.show(Image.ARROW_N)
        # adjust speeds to help robot go straight
        self.km.motor_on(self.km.MOTOR_1, self.km.FORWARD, 60)
        self.km.motor_on(self.km.MOTOR_2, self.km.FORWARD, 60)

    def go_reverse(self):
        display.show(Image.ARROW_S)
        # adjust speeds to help robot go straight
        self.km.motor_on(self.km.MOTOR_1, self.km.REVERSE, 70)
        self.km.motor_on(self.km.MOTOR_2, self.km.REVERSE)

    def go_left(self):
        display.show(Image.ARROW_W)
        # adjust speed to turn the robot
        self.km.motor_on(self.km.MOTOR_1, self.km.FORWARD, 40)
        self.km.motor_on(self.km.MOTOR_2, self.km.FORWARD)

    def go_right(self):
        display.show(Image.ARROW_E)
        # adjust speed to turn the robot
        self.km.motor_on(self.km.MOTOR_1, self.km.FORWARD)
        self.km.motor_on(self.km.MOTOR_2, self.km.FORWARD, 40)

    def spin_right(self):
        display.show(Image.ARROW_NE)
        self.km.motor_on(self.km.MOTOR_1, self.km.FORWARD)
        self.km.motor_on(self.km.MOTOR_2, self.km.REVERSE)

    def spin_left(self):
        display.show(Image.ARROW_SW)
        self.km.motor_on(self.km.MOTOR_2, self.km.FORWARD)
        self.km.motor_on(self.km.MOTOR_1, self.km.REVERSE)

    def stop(self):
        self.km.motor_off(self.km.MOTOR_1)
        self.km.motor_off(self.km.MOTOR_2)
        display.clear()


# instantiate a Robot
r = Robot()
Each command method displays an image on the display, or for the stop command, clears the display in order to preserve battery life. Each method invokes the appropriate KMotor method to control the motors.
FLASHING MICROBIT_ROBOT_MIN.PY
Using your favorite editor, such as PyCharm (using pseudo-microbit or the micropython plugin), the Mu Editor, or the on-line editor, cut and paste microbit_robot_min.py into your editor and flash it onto the micro:bit.
The robot is now ready to be controlled by one of the remote controllers.