
Direct Hardware Control

In this edition of Bots In Pieces, we will:
- Discuss controlling motors and sensors using Python Banyan:
- Create a Banyan OneGPIO Gateway that directly interacts with the hardware.
- Create a Tkinter test fixture to test the gateway.
Hardware Monitoring And Control
When choosing a hardware interface to use, you may consider designing and building a custom interface using discrete components or, you might use a more integrated approach, such as a Raspberry Pi HAT.
The custom approach allows the flexibility of choosing each of the components, but you are also responsible for both physical and electrical design.
 Discrete
Component Approach
Integrated
Approach
Discrete
Component Approach
Integrated
Approach
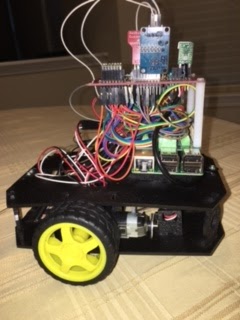
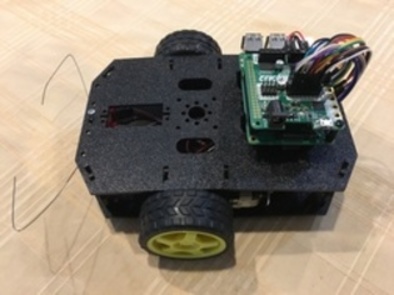
For the Banyan Bot Blue project, the integrated approach was chosen, taking advantage of the Adafruit Crickit HAT, thereby greatly simplifying physical and electrical design and construction.
The Banyan OneGPIO Gateway Concept
Now that we’ve selected a hardware interface, we need a Banyan component to control and monitor that interface. The function of this component is to translate Banyan messages to and from hardware-specific API calls. From the Banyan perspective, a standard messaging specification, called OneGPIO, is used to describe all hardware interactions. Because all Banyan hardware interface components employ the OneGPIO message specification, we call this type of component a Banyan OneGPIO Gateway.
A Banyan OneGPIO Gateway consists of 2 major parts, a consistent Banyan interface that all OneGPIO Gateways share, and a hardware-specific section that allows direct hardware monitoring and control.

All OneGPIO Gateways derive from a standard base class, called GatewayBase. The GatewayBase class ensures that the Banyan OneGPIO protocol messages are processed consistently. The OneGPIO messaging protocol is a hardware-independent abstraction of hardware and GPIO control and monitoring. The role of the OneGPIO Gateway is to convert this abstract view to direct hardware control for each supported hardware type.
By using the Banyan OneGPIO Gateway approach, the actual hardware is loosely-coupled from the rest of the application. So, if you wish to go from one hardware platform to another, you need only swap out one Banyan OneGPIO Gateway for another, without having to recode any of the other components.
There are OneGPIO Gateways available for the Raspberry Pi that utilizes the pigpio API, for Arduino microcontrollers, that uses Pymata-Express, and for the ESP-8266 that makes use of a board resident micropython API.
For this project, we create an additional OneGPIO Gateway, the Crickit HAT Gateway, that expands Banyan support for the Raspberry Pi. With this additional gateway, you now have the choice to use discrete components or the HAT approach for hardware design.
The Crickit OneGPIO Gateway
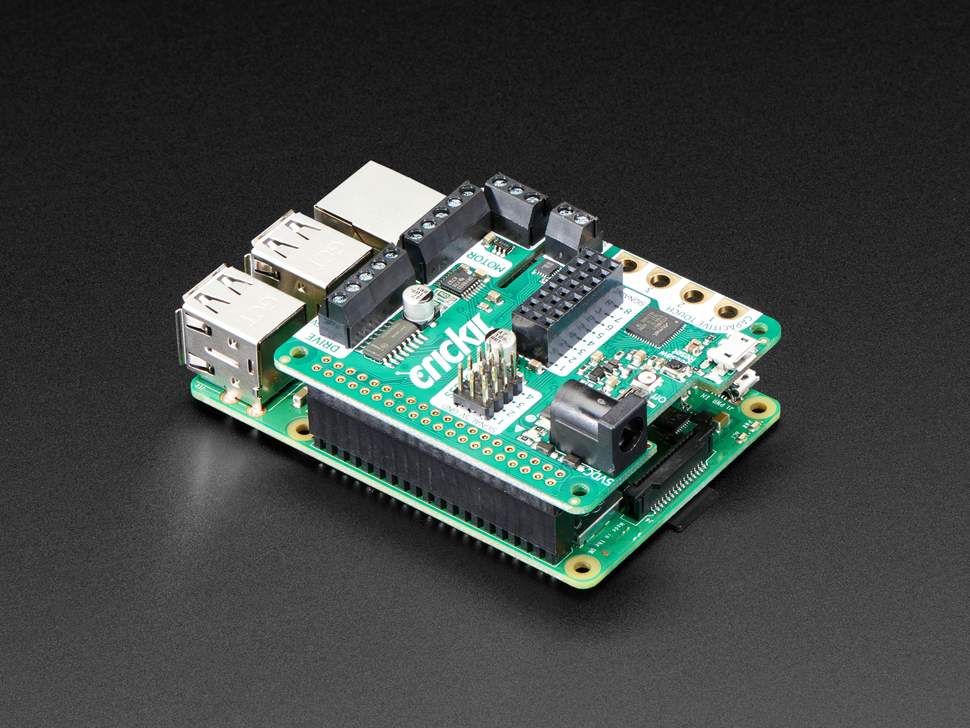
Before getting into some of the details of coding the Crickit Hardware Gateway, let’s take a look at the Crickit’s capabilities.
Crickit HAT Capabilities
The Crickit HAT supports the following functionality:
- 8 Input/Output Channels
- Each individually configurable for input as:
- Digital Input
- Digital Input/Pull Up
- Analog Input
- Digital Output
- Each individually configurable for input as:
- 4 Touch Inputs
- 8 Digital Outputs
- 4 “Drive” Outputs
- For controlling items, such as solenoids
- Can be used for PWM output
- 2 D.C. Motor Controllers
- 4 Servo Motor Controllers
- 2 Stepper Motor Controllers
- 1 Neopixel Controller
- I2S Speaker Output
Note: The Cricket OneGPIO Gateway supports all of these capabilities, except for the I2S speaker output. The Adafruit web site warns of several caveats about Raspbian support for this feature. You may enable the I2S feature, but the OneGPIO Gateway does not directly support it.
In reality, the Banyan Bot Blue has very modest needs compared to the Crickit HAT’s capabilities. We only need to control 2 motors, both for speed and direction and to monitor 2 bumper sensors, for when the robot bumps into something. So why create a OneGPIO Gateway for virtually all of the Crickit HAT’s capabilities when only a small subset is needed? The answer is simple. If all the features are supported, then in the future, if we need to use features over and beyond the needs of the Banyan Bot Blue, we do not need to go back into the code and potentially break something that is already working. The motto here is: “Write once, test once, and reuse many times.”
Supporting OneGPIO
As mentioned earlier, all Banyan OneGPIO Gateways support a standardized protocol messaging specification known as OneGPIO. To accomplish this, and to make coding more straightforward, the GatewayBase class provides a coding template to enforce consistency across all Banyan Hardware Gateways.
To better understand the CrickitGateway, it is essential to understand the inheritance hierarchy that all Banyan OneGPIO Gateways employ. For more detail about the code, click on the links below.
The Crickit Gateway Inheritance Hierarchy

At the top of the hierarchy is the BanyanBase class. Every Banyan component derives from this base class. The BanyanBase class is responsible for network connectivity, formatting and publishing Banyan protocol messages, and decoding received Banyan protocol messages.
The GatewayBase class is directly below and derived from the BanyanBase class. The GatewayBase class defines the standard programming interface for managing OneGPIO protocol messages. The GatewayBase Class maintains a look-up dictionary to route a OneGPIO message to its handler. The handlers in the base class are empty and must be overwritten in the class implementing the OneGPIO Gateway.
Below the GatewayBase class is the hardware-specific OneGPIO Gateway class. In the case of the Crickit Gateway, it translates the OneGPIO messages into method calls for the Adafruit Cricket Library.
Because it is impossible to know all future hardware messaging needs, the OneGPIO message specification was designed to be extensible. You can expand upon the OneGPIO message set by merely creating a new message. When a message is received by a OneGPIO Gateway that is not a member of the OneGPIO specification, that message is passed to and processed by the derived message handler method called additional_banyan_messages.
Adding functionality to the OneGPIO specification is as simple as defining a new message, and processing that message in the additional_banyan_messages method without having to modify the GatewayBase class. For example, the Cricket Gateway handles message requests for D.C. and stepper motor control as well as neo-pixel support within its overwritten additional_banyan_messages method.
The Adafruit Cricket Library, unfortunately, does not provide for callback notifications when input values change. Instead, one must poll the inputs for change. The Crickit Gateway uses a separate thread to poll the inputs and publishes a value change message if the value for a given input changes from the previous poll. It also provides a timestamp as to when the change occurred, this way cutting down redundant messaging.
Testing The Crickit Gateway
To test all of the Cricket Gateway’s functionality, we employ a Banyan compatible GUI test fixture.
Banyan And Tkinter Coexistence
Both Banyan and Tkinter use dedicated event loops to process messages and events. We need to find a way for each of these loops to coexist without blocking one another.
To solve this dilemma, we run the Tkinter event loop, but have it periodically call a method that performs the function of the Banyan receive_loop. The get_message method is added to the GUI application to emulate the Banyan receive loop.
The get_message method is executed regularly within the Tkinter main_loop by using the Tkinter “after” method.
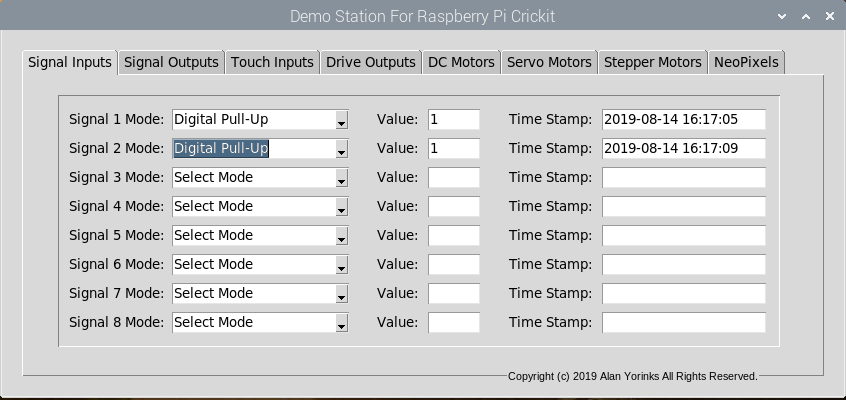
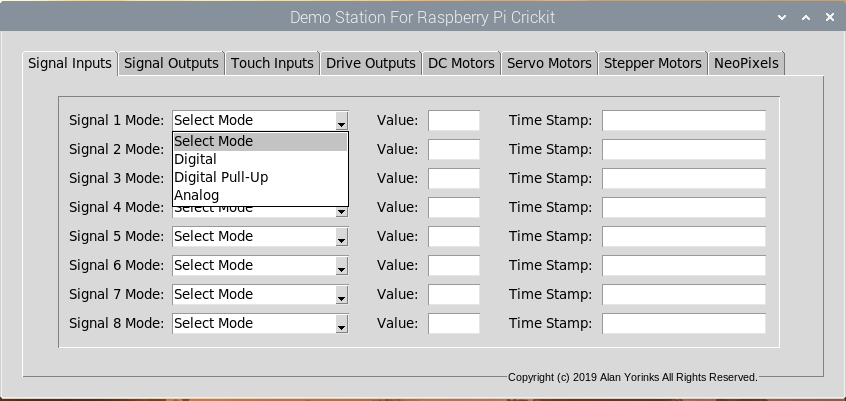
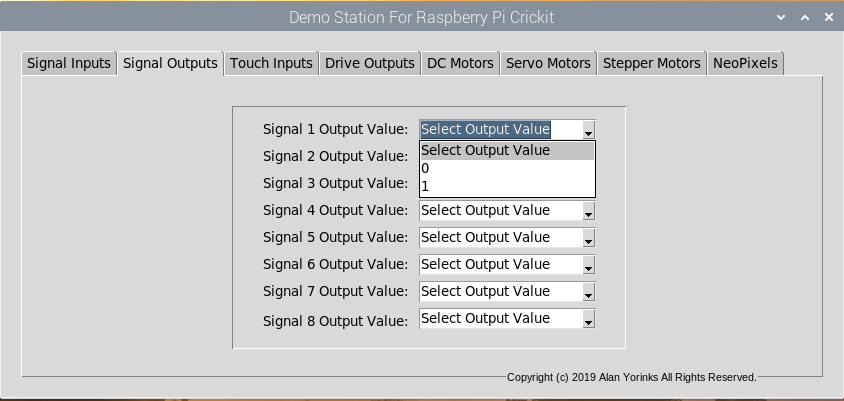
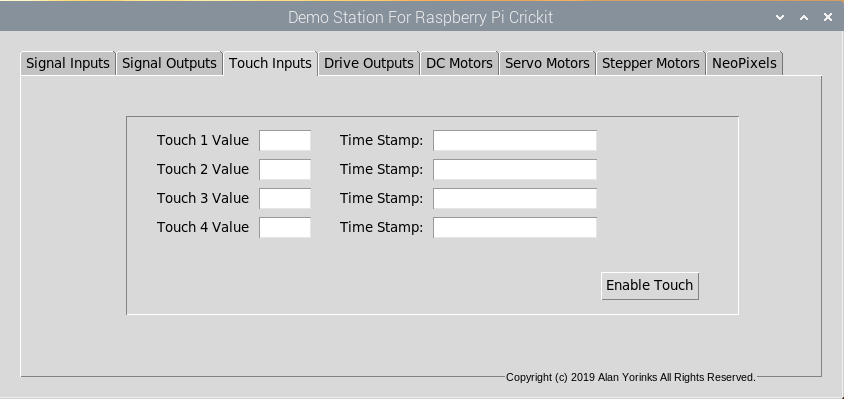
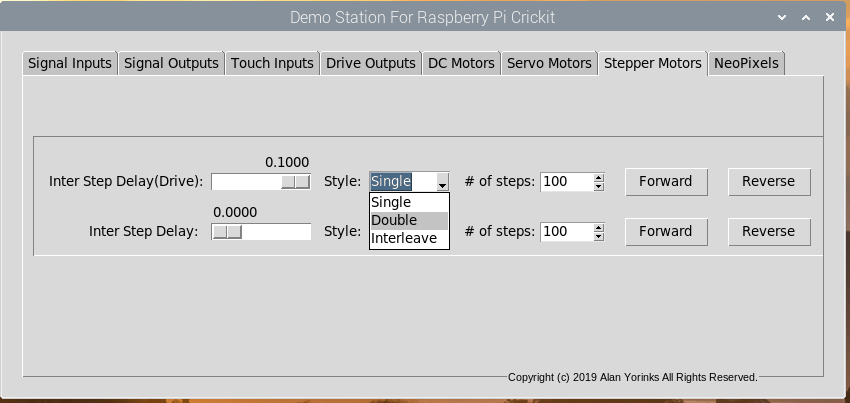
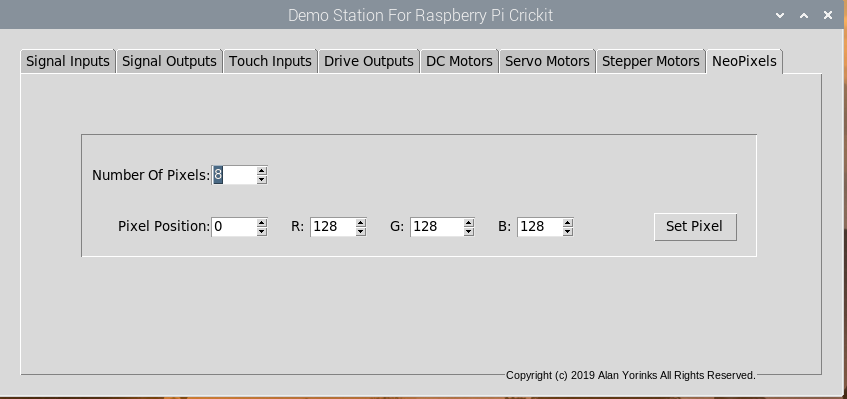
The GUI Selection Tabs
The GUI has 8 tabs, each one dedicated to a Crickit functional group. Above, we see the Signal Inputs tab selected and that for Signal 1 and 2, the time that their respective values changes. The bumper switches connect to these signals.
You can view screenshots for all eight tabs below.


To launch all the test components, make sure that you have the latest version of bots-in-pieces-examples. On your Raspberry Pi, open the browser and go to the bots-in-pieces-examples GitHub page. Click on the green Clone or download button on the page. Unzip the file into any directory you wish.
To start the test files, open a new command window and go to:
bots-in-pieces-examples-master/banyan-bot-blue/tests/crickit_gateway
Next, run the Banyan Launcher using the -f option to specify the test specification file:
bls -f cr1.csv
To perform the tests, you interact with the GUI, observe the hardware’s behavior, and compare it to the expected behavior.
You can create a coverage report using the command:
coverage html -d coverage_html
Next Time
Next time we cover the robot component, the brains of the application.