

Testing The Bluetooth Gateway
In this edition of Bots In Pieces, we will:
- Test The Bluetooth Gateway:
- Install the necessary software for testing on the Raspberry Pi.
- Discuss the Banyan Backplane.
- Learn how to use the Banyan Monitor and Message Injector tools to aid in testing.
- Use previously tested items as test drivers and monitors to accelerate the test cycle.
- Discuss the Python Coverage tool.
- Learn how to automate the tests procedures using the Banyan Launcher as a test runner.
Presented here is my approach to testing Python Banyan components. Note that the Banyan Framework does not inhibit the use of any testing techniques or test runners. You are free to use any tools or techniques with which you are comfortable.
Some Test Preliminaries
If you have not already done so, install Python Banyan on the Raspberry Pi by opening a command window and typing:
sudo pip3 install python-banyan
Next, we need to install the Banyan Bot Blue project files on the Raspberry Pi.
On your Raspberry Pi, open the browser and go to the bots-in-pieces-examples GitHub page. Click on the green Clone or download button on the page. Unzip the file into any directory you wish.
Here is a representation of the file structure after you extract the zip file:
bots-in-pieces-examples-master
├── banyan-bot-blue
│   ├── android
│   │   ├── b_bot_blue.aia
│   │   └── b_bot_blue.apk
│   ├── banyan_assets
│   │   ├── bluetooth_gateway.py
│   │   ├── crickit_gateway.py
│   │   ├── __init__.py
│   │   └── robot_control.py
│   ├── banyan_templates
│   │   ├── banyan_component_template.py
│   │   └── __init__.py
│   ├── __init__.py
│   ├── test_fixtures
│   │   ├── bluetooth_apk_validation_server.py
│   │   ├── crickit_gui.py
│   │   ├── __init__.py
│   │   ├── json_server.py
│   │   ├── message_injector.py
│   │   └── rfcomm_server.py
│   └── tests
│       ├── bluetooth_gateway
│       │   ├── btg1.csv
│       │   ├── btg2.csv
│       │   ├── btg3.csv
│       │   ├── btg4.csv
│       │   ├── btg5.csv
│       │   ├── __init__.py
│       │   ├── procedures
│       │   │   ├── btg1.test_spec.pdf
│       │   │   ├── btg2.test_spec.pdf
│       │   │   ├── btg3.test_spec.pdf
│       │   │   ├── btg4.test_spec.pdf
│       │   │   └── btg5.test_spec.pdf
│       │   └── test_results
│       │       ├── btg1_2_3_4_5_results.pdf
│       │       ├── btg1_2_3_4_5_summary.pdf
│       │       ├── btg1_2_3_4_results.pdf
│       │       ├── btg1_2_3_4_summary.pdf
│       │       ├── btg1_2_3_results.pdf
│       │       ├── btg1_2_3_summary.pdf
│       │       ├── btg1_2_results.pdf
│       │       ├── btg1_2_summary.pdf
│       │       ├── btg1_results.pdf
│       │       └── btg1_summary.pdf
│       ├── crickit_gateway
│       │   ├── cr1.csv
│       │   ├── __init__.py
│       │   └── test_results
│       │       ├── cr1_results.pdf
│       │       └── cr1_summary.pdf
│       ├── __init__.py
│       └── motor_control
│           ├── __init__.py
│           └── mc1.csv
├── LICENSE
└── README.md
Next, we need to install xterm on the Raspberry Pi. Open a command window on the Raspberry Pi and type:
sudo apt-get install xterm
Lastly, we need to install the Python Coverage tool. In the command window, type the following:
sudo apt-get install python3-dev gcc
Then type:
sudo pip3 install coverage
The Banyan Backplane
When a Banyan component initializes, it attempts to connect to the Banyan Backplane using two TCP/IP connections, one for message publishing and one for message reception. The backplane is a command-line executable, automatically installed with Python Banyan. To launch the backplane, open up a terminal window on the Raspberry Pi and type:
backplane
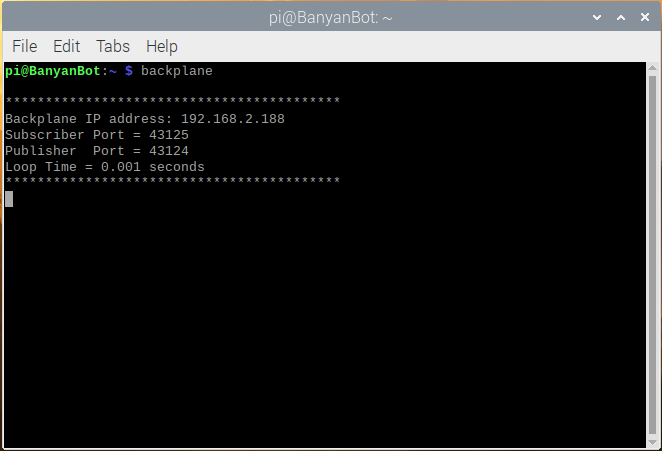
When the backplane starts, a familiar Banyan header prints to the console.
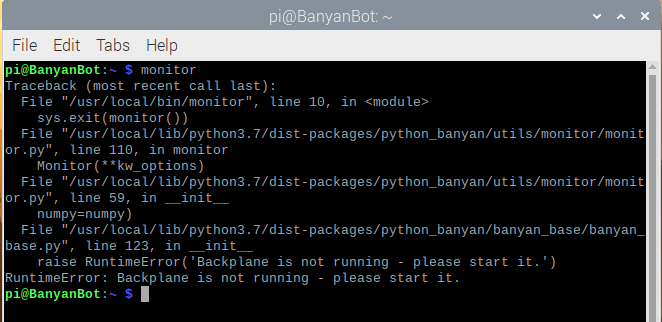
Before launching any other Banyan component, you must run the backplane. If the backplane is not running when launching a Banyan component, an exception and error message are displayed.
The Banyan Monitor
The Banyan Monitor is a specialized Banyan component that allows you to view all published Banyan messages. The monitor is a command-line executable, automatically installed with Python Banyan.
To run the monitor, while the backplane is running, open a new command window and type:
monitor
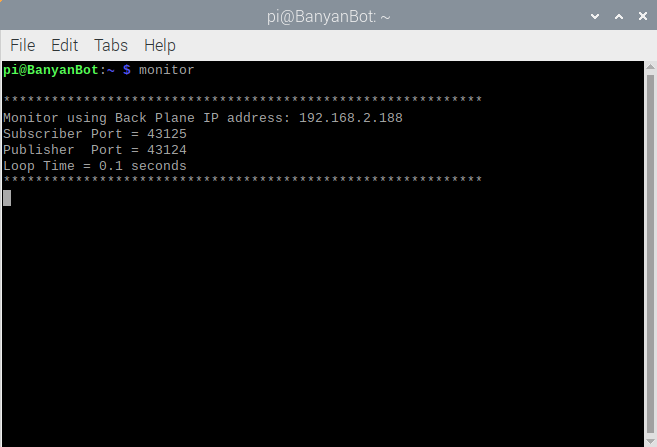
Again we see the familiar Banyan header, but since there are no published messages, that is all we see. Let’s remedy that by starting a Banyan component that publishes messages periodically.
The Message Injector Component
To demonstrate the monitor, we launch a test fixture used to help test the Banyan Gateway. This Banyan component, unlike the backplane and monitor, is not a command-line executable, so we need to launch it manually. We find the message injector in:
bots-in-pieces-examples-master/banyan-bot-blue/test_fixtures
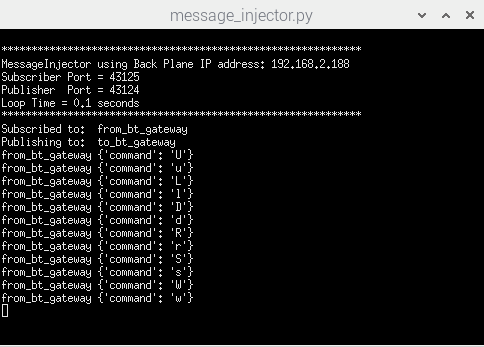
This component periodically injects Banyan messages into the network. It has a default publishing topic of to_bt_gateway. It also subscribes to receive messages with a topic of from_bt_gateway.
With both the backplane and monitor running, let’s launch the message injector. Open a new command window, cd into the directory shown above and type:
python3 message_injector.py
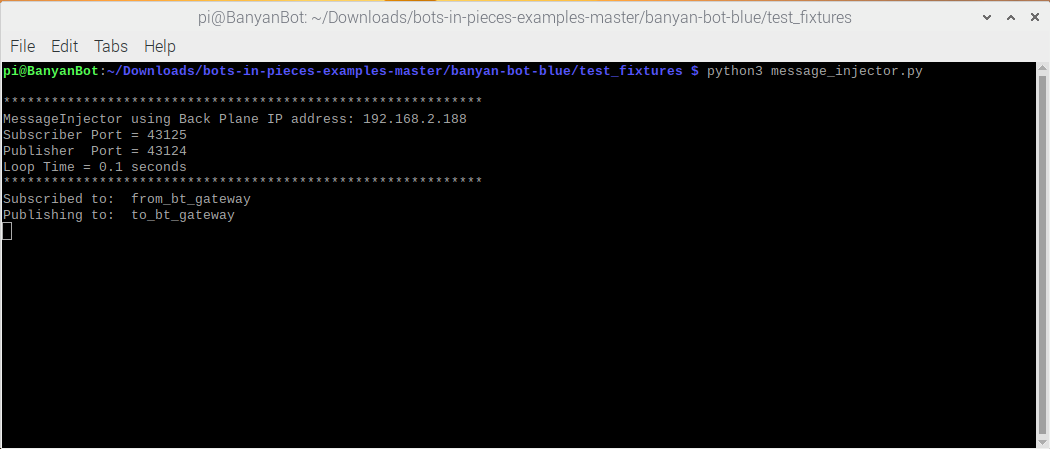
Again, we see a familiar Banyan header with the addition of the publishing and subscription topics announced.
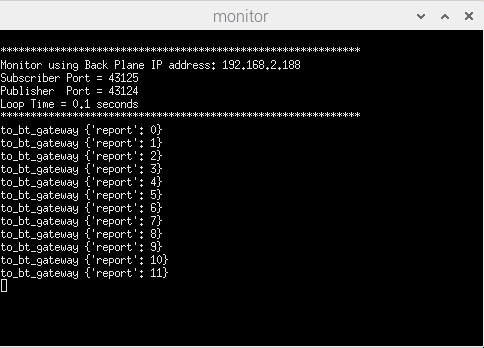
Look at the monitor window, and you should see injector messages appear as they are published.
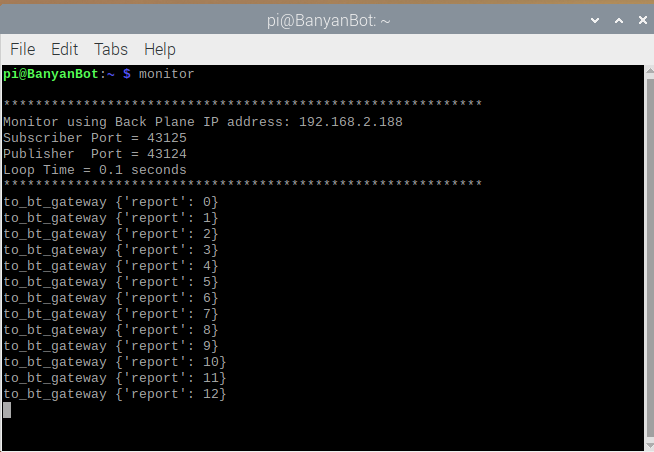
Each line in the monitor window represents a single Banyan protocol message, and it contains both the publishing topic and the message’s payload.
The Banyan Launch Server
I don’t know about you, but having to manually open several command windows and then individually interacting with each one, is not my idea of fun.
Using the Banyan Launcher, the backplane, the monitor, the message_injector, and the bluetooth_gateway are all launched from a single command.
Understanding The Banyan Launcher
The Banyan Launcher Server(bls) is a command-line executable, automatically installed with Python Banyan. To use the launcher, you must first populate a comma-delimited or csv file. This file, called the launch specification file, contains a list of the items to be launched and their associated launch instructions.
The first line of every launch specification is a comma-delimited list of column headings:
command_string,spawn,topic,append_bp_address,auto_restart,wait
A set of launch specifications, one launch item per line, follows the column headings.
NOTE: There must not be any spaces before or after the commas on any lines of the specification file.
The Launch Specification Field Headings
command_string
In this field, you specify the shell command used to launch the item. The example below is the command string to launch the message_injector. Notice that it uses relative addressing to find the file because our test runs in the following directory:
bots-in-pieces-master/banyan-bot-blue/tests/bluetooth_gateway
Example:
python3 ../../test_fixtures/message_injector.py
spawn
The values for this field are either yes or no. If set to yes, each command runs in a stand-alone xterm window.
topic
Set this field to local. The Banyan Launcher can launch commands on a remote computer. In the remote launch scenario, we set this field to something other than local.
append_bp_address
The values for this field are either yes or no. For our purposes, set this field to no. This field would be set to yes when launching on a remote computer, and we wish to inform the remote computer of the backplane address of the local computer.
auto_restart
The values for this field are either yes or no. If set to yes, the launcher automatically restarts the command if it should die for any reason. We set this to no.
wait
This field specifies a period in seconds to wait before launching the next command in the file. The wait field allows the command to initialize fully before processing the next launch line.
A Sample Launch Specification
btg1.csv
Here are the contents of btg1.csv, a test that runs the Bluetooth Gateway, accepting its default parameters.

The first line launches the Banyan Monitor, the second line launches the Bluetooth Gateway, accepting all its default parameters, and the third line launches the message_injector.
When using the Banyan Launcher, it automatically launches the backplane without having to specify the backplane in the launch specification file.
Code Coverage
We can test the Bluetooth Gateway by stimulating both of its interfaces, that is, its RFCOMM interface as well as its Banyan protocol messaging interface. We then observe the results of this stimulation and compare that to the expected results. Sometimes this type of testing is referred to as BlackBox testing. BlackBox testing tests an item’s behavior but provides no information about what is happening inside the item under test.
WhiteBox testing provides an internal code view of the unit under test. A form of WhiteBox testing is called code coverage. Code coverage determines which statements in a body of code have executed through a test run, and which statements have not. In general, a code coverage system collects information about the running program and then combines that with source information to generate a report. The tool used to perform coverage testing is the Python Coverage Tool.
By combining the results from both BlackBox and WhiteBox testing, we can determine if the unit under test is operating correctly.
Testing With The Coverage Tool
To enable coverage testing for bluetooth_gateway.py, we issue the following command:
"sudo coverage run --branch --append --omit=/usr/lib*,/usr/local* ../../banyan_assets/bluetooth_gateway.py"
Notice that we enclose the entire command in quotes. The bash shell requires this so that it may successfully parse and execute the command.
The Coverage Command In Detail
The command requires sudo because the Bluetooth library requires it.
The next portion of the command is coverage run. The run option instructs the coverage tool to instrument the code and to execute the module.
The --branch option enables branch coverage. Branch coverage allows us to see the executed and non-executed legs of a branch.
The --append option tells coverage to append the results of the current test to previous results. This option allows us to run several different tests on the gateway, and then be able to view a single report showing the aggregated results from all the tests.
The --omit option limits coverage testing to only the files we wish to test.
Finally, we specify the path and file name for the unit under test.
Getting The Coverage Results
The coverage tool can generate HTML coverage reports. To generate HTML reports, we use the following command:
coverage html -d coverage_html
By executing this command, coverage creates and populates a directory called coverage_html, allowing us to display the report in a Web browser. To view the generated report, open up index.html in the coverage_html directory using your favorite Web browser.
Coverage Summary Report
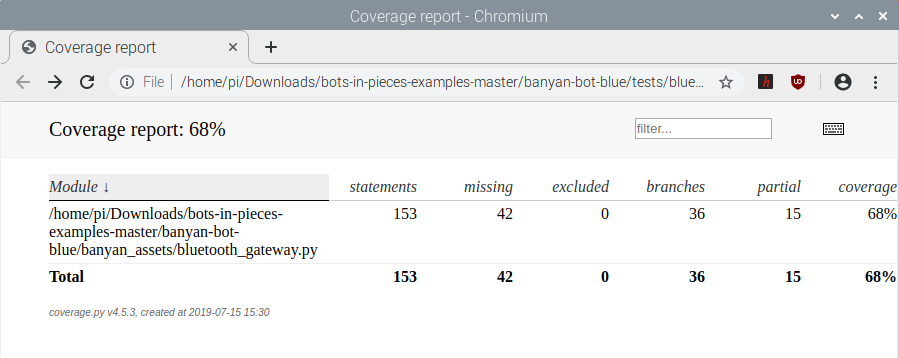
We see a summary report when opening index.html. The report shown above is the result of running the btg1.csv test specification. The report indicates that the unit under test had 153 executable lines of code and an execution rate of 68%.
By clicking on the link in the summary report, we can view the detailed coverage report.
Coverage Detailed Report
Below is a portion of a detail report that the coverage tool generated:
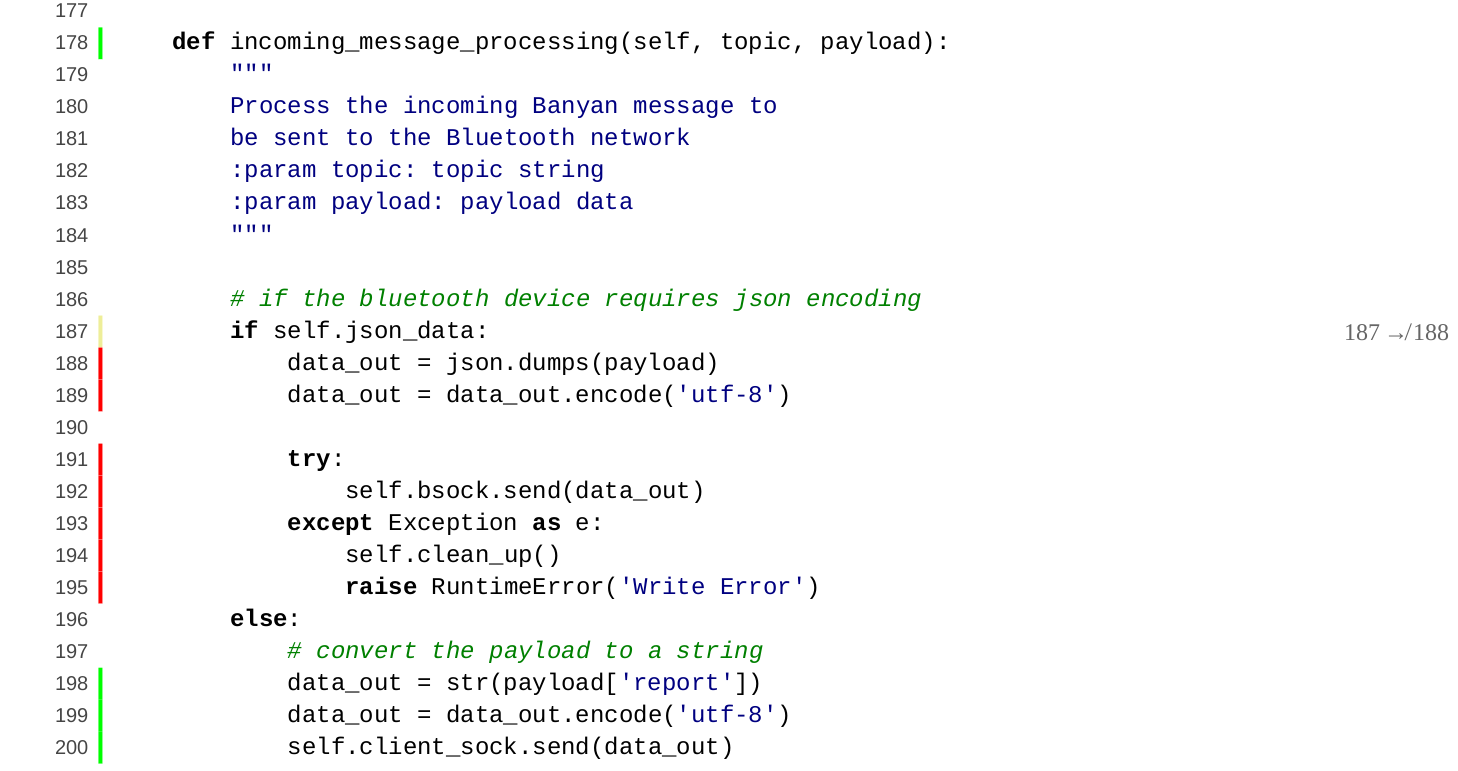
The report is color-coded. A green bar next to a line of code indicates the line executed; a red bar means that line did not execute, and a yellow bar means that a branch partially executed.
The coverage tool allows you to accumulate test results as each test is run and then generate an aggregated report of all the test runs.
It is good practice to save the test reports for comparison with future test runs.
Test Evaluation
Notice when viewing the full detailed report for btg1.csv, the lines of code that were not executed fall into two categories. The first being the paths that support the command-line options we did not use, and the second, the exception paths.
By examining this report, we can determine that the executed code is sufficient to support the Banyan Bot Blue, even though it is only 68% of the total. Since the Bluetooth Gateway was written to be configurable through its command-line options, we can add additional tests that thoroughly test the file, and four additional tests were devised to do just that.
If you look at the detailed report for the aggregated results, coverage achieved is 88%. The 12% of the code not covered were for the exception cases. For our purposes, 88% coverage is a good passing percentage.
Documenting Test Procedures
Before starting to test, it is beneficial to document the specifications and procedures for each test to be run. I do this in a somewhat formalized way, and each specification typically contains:
- The purpose or scope of the test.
- A list of items and prerequisites necessary to run the test.
- The test procedure. I like to include hyperlinks within the spec to provide any supporting documentation that might be helpful.
Here is an example of a test specification for testing the Bluetooth Gateway accepting all default command-line parameters.
When you open the file in GitHub, the links are not active, but if you open the file in the distribution you downloaded from GitHub, the links are functional.
Running The Test With The Banyan Launcher
Now that we understand all the tools used in testing the Bluetooth Gateway let’s run a test using the Banyan Launcher(bls). Here are the steps to do so:
-
Close all the command windows we opened previously.
- Open a new command window and go to
bots-in-pieces-examples-master/banyan-bot-blue/tests/bluetooth_gateway - Run the Banyan Launcher using the -f option to specify the test specification file:
bls -f btg1.csv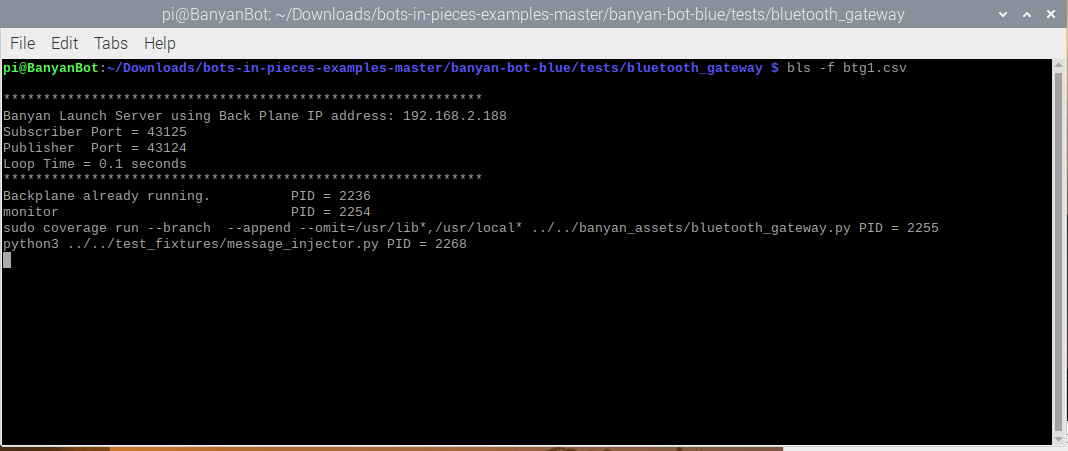
- The command window displays that bls launched the backplane, monitor, bluetooth_gateway, and the message_injector, showing the process ID or PID for each. It also opened up 3 additional xterm windows, one each for the monitor, bluetooth_gateway, and message_injector. If you look at the monitor window, the injector messages appear.
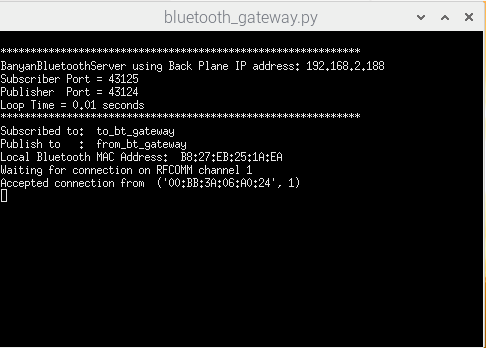
- We now want to connect the Android app as discussed in a previous posting. Start the app and connect it to the Raspberry Pi. The bluetooth_gateway window should indicate that the connection succeeded.
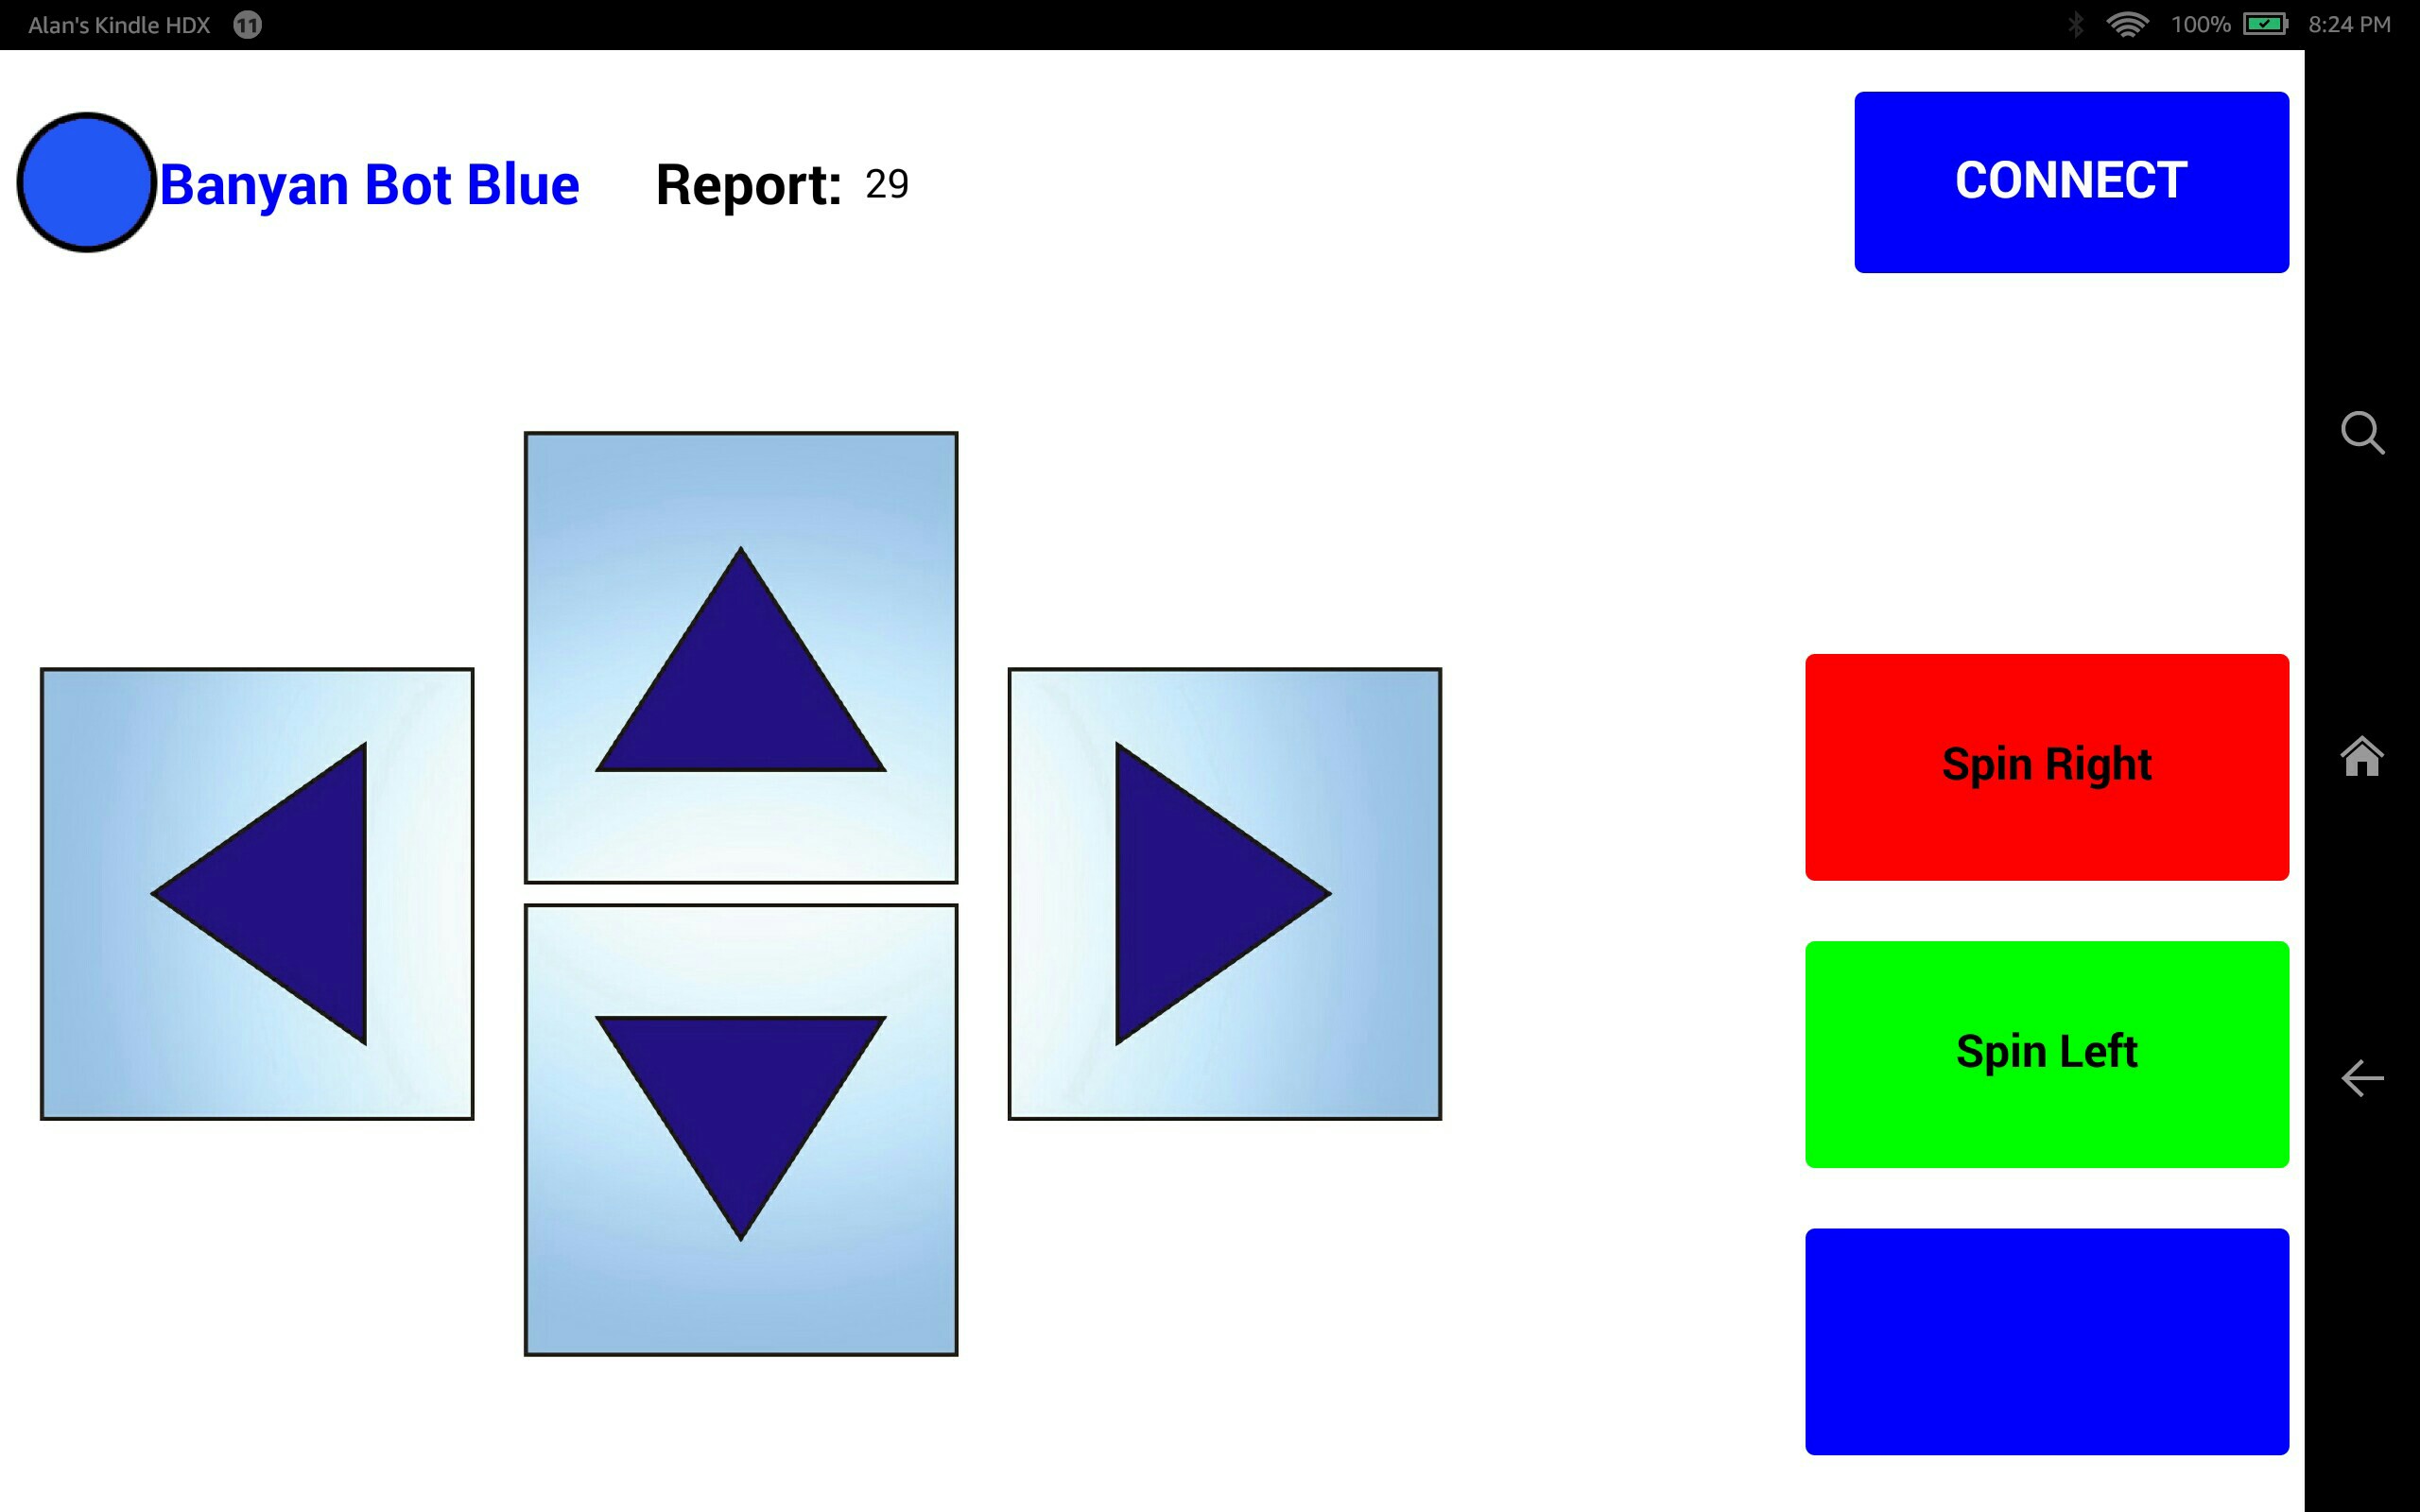
After connecting the app, you should see the value in the Report line change as each message from the message injector is received:
- Now press the Android app buttons. If you look at the monitor window, you should see both the messages that were published by the message injector as well as the messages published by the Bluetooth Gateway.
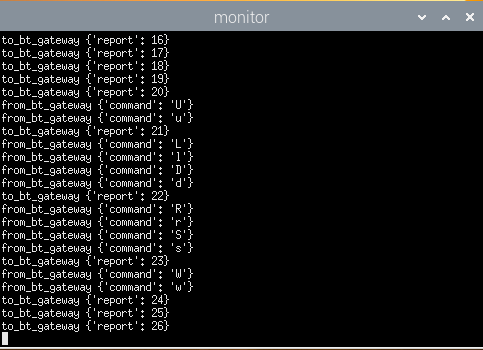
- If you look at the message_injector window, you should see the messages from the Bluetooth Gateway as well. The message injector subscribed to receive those messages. Verify that for each button pressed in the Android app generates the expected messaging.
Why Manual Interaction And Not Total Automation?
At some point in the testing cycle, you must verify that user interfaces work as expected. Adding mock type automation adds an unnecessary step, so why not test things out as early as possible. Since we tested the Android app in an earlier posting, we can now use it as a test driver. If we do not have a tested component to run portions of the test, only then do we create a mocking type component. The message injector is an example of this.
Stopping The Test And Getting Results
To stop the test, go into the Bluetooth Gateway xterm window and type Control-C to stop it. We need to stop the gateway within this window to allow the coverage tool to terminate properly and provide results. If you then go into the bls command window and press Control-C, all the other xterm windows should close. Now generate a test report as described above to verify expected code execution.
Summing Up
Using the tools and techniques presented in this posting, we demonstrated that Banyan components are testable in an easily reproducible manner. We demonstrated that previously tested components are practical testing drivers and monitors. We also demonstrated the ease of integrating custom test tools, such as the message injector, into the testing suite.
Next Time
In the next posting, we discuss the Crickit Gateway component that monitors and controls the robot motors and sensors.