
An Android App For Robot Control
In this edition of Bots In Pieces, we will:
- Discuss the Android app that will control our robot’s motion.
- Install the app on an Android device.
- Connect the app to the Bluetooth test server discussed in the previous post.
- Explain the modifications made to the Android app to better meet our needs.
Origins Of The Android App
In full disclosure, for the most part, the Android control app we will use was developed by Martyn Currey. I did however, make some simple modifications to meet the needs of this project.
Martyn developed the app using App Inventor, and his article does an excellent job at explaining the visual aspects as well as the coding aspects of his project. It is well worth the read.
If you are unfamiliar with App Inventor, it is a Web-based IDE that allows you to easily create Android apps. It provides a drag-and-drop GUI design editor and a block language for coding the program logic. It is fairly easy to use and there are many tutorials available that explain how to use it.
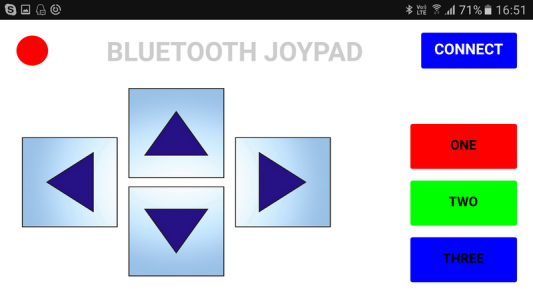
What did the original app look like on an Android device? Here is a screenshot from the original article:
Changes To Martyn’s Work
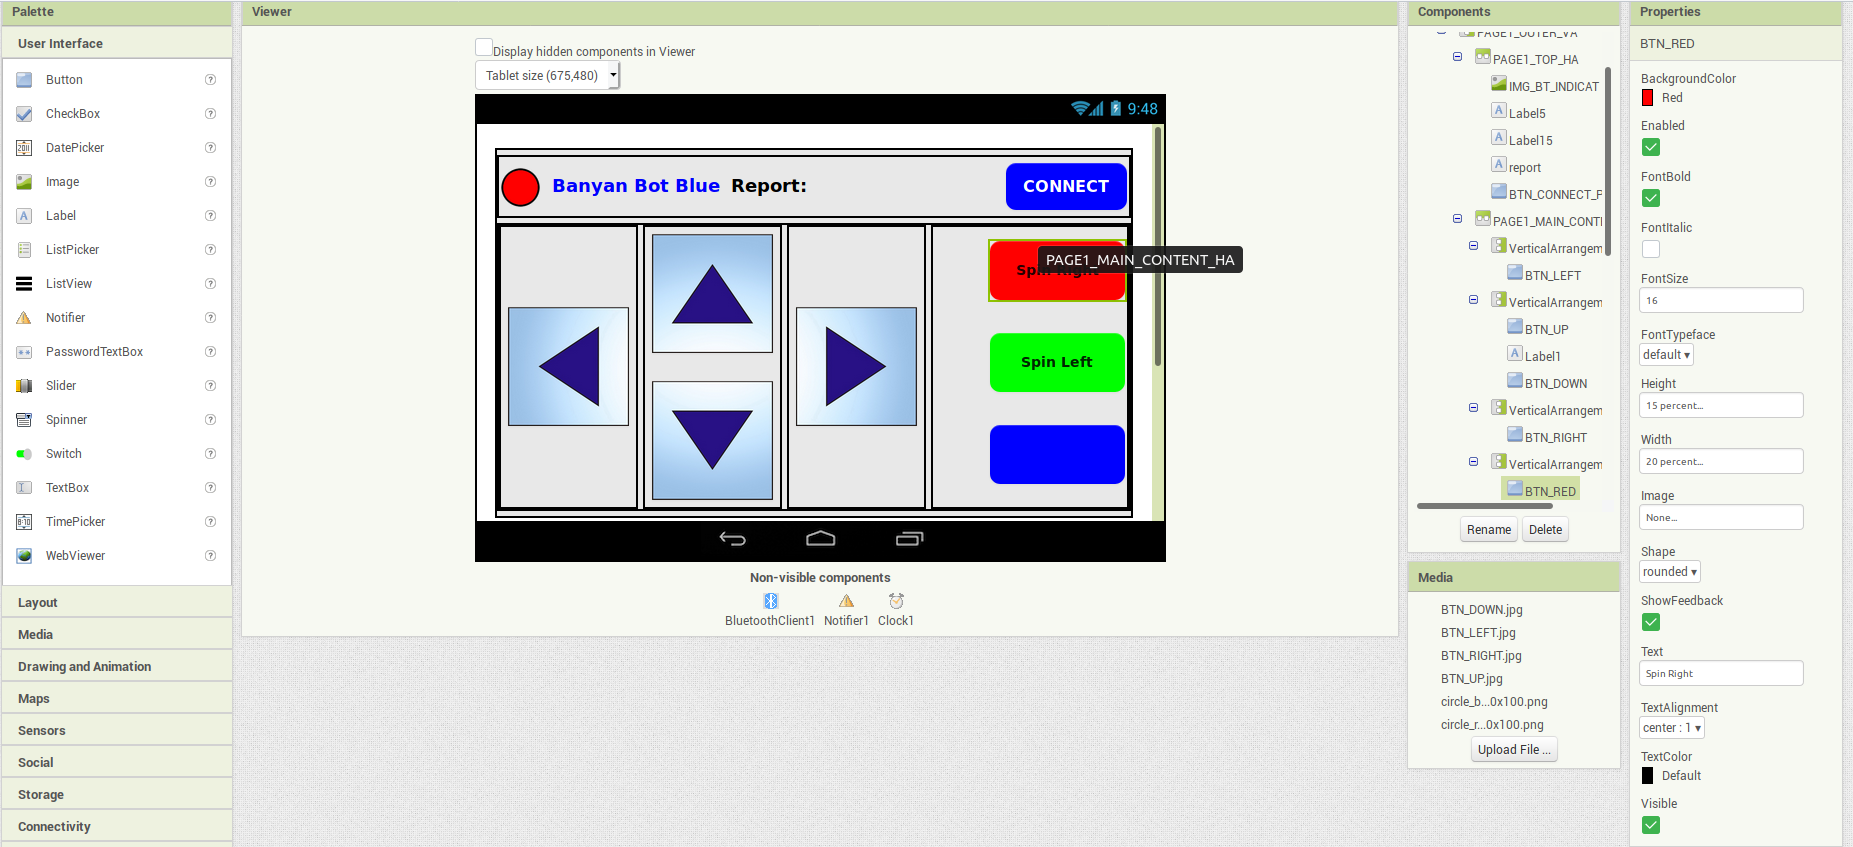
The changes are minor. In the original design, when any of the on-screen buttons are pressed, a command consisting of an uppercase letter is sent across the Bluetooth link. When the button is released, a command consisting of a lower case letter is sent across the Bluetooth link.
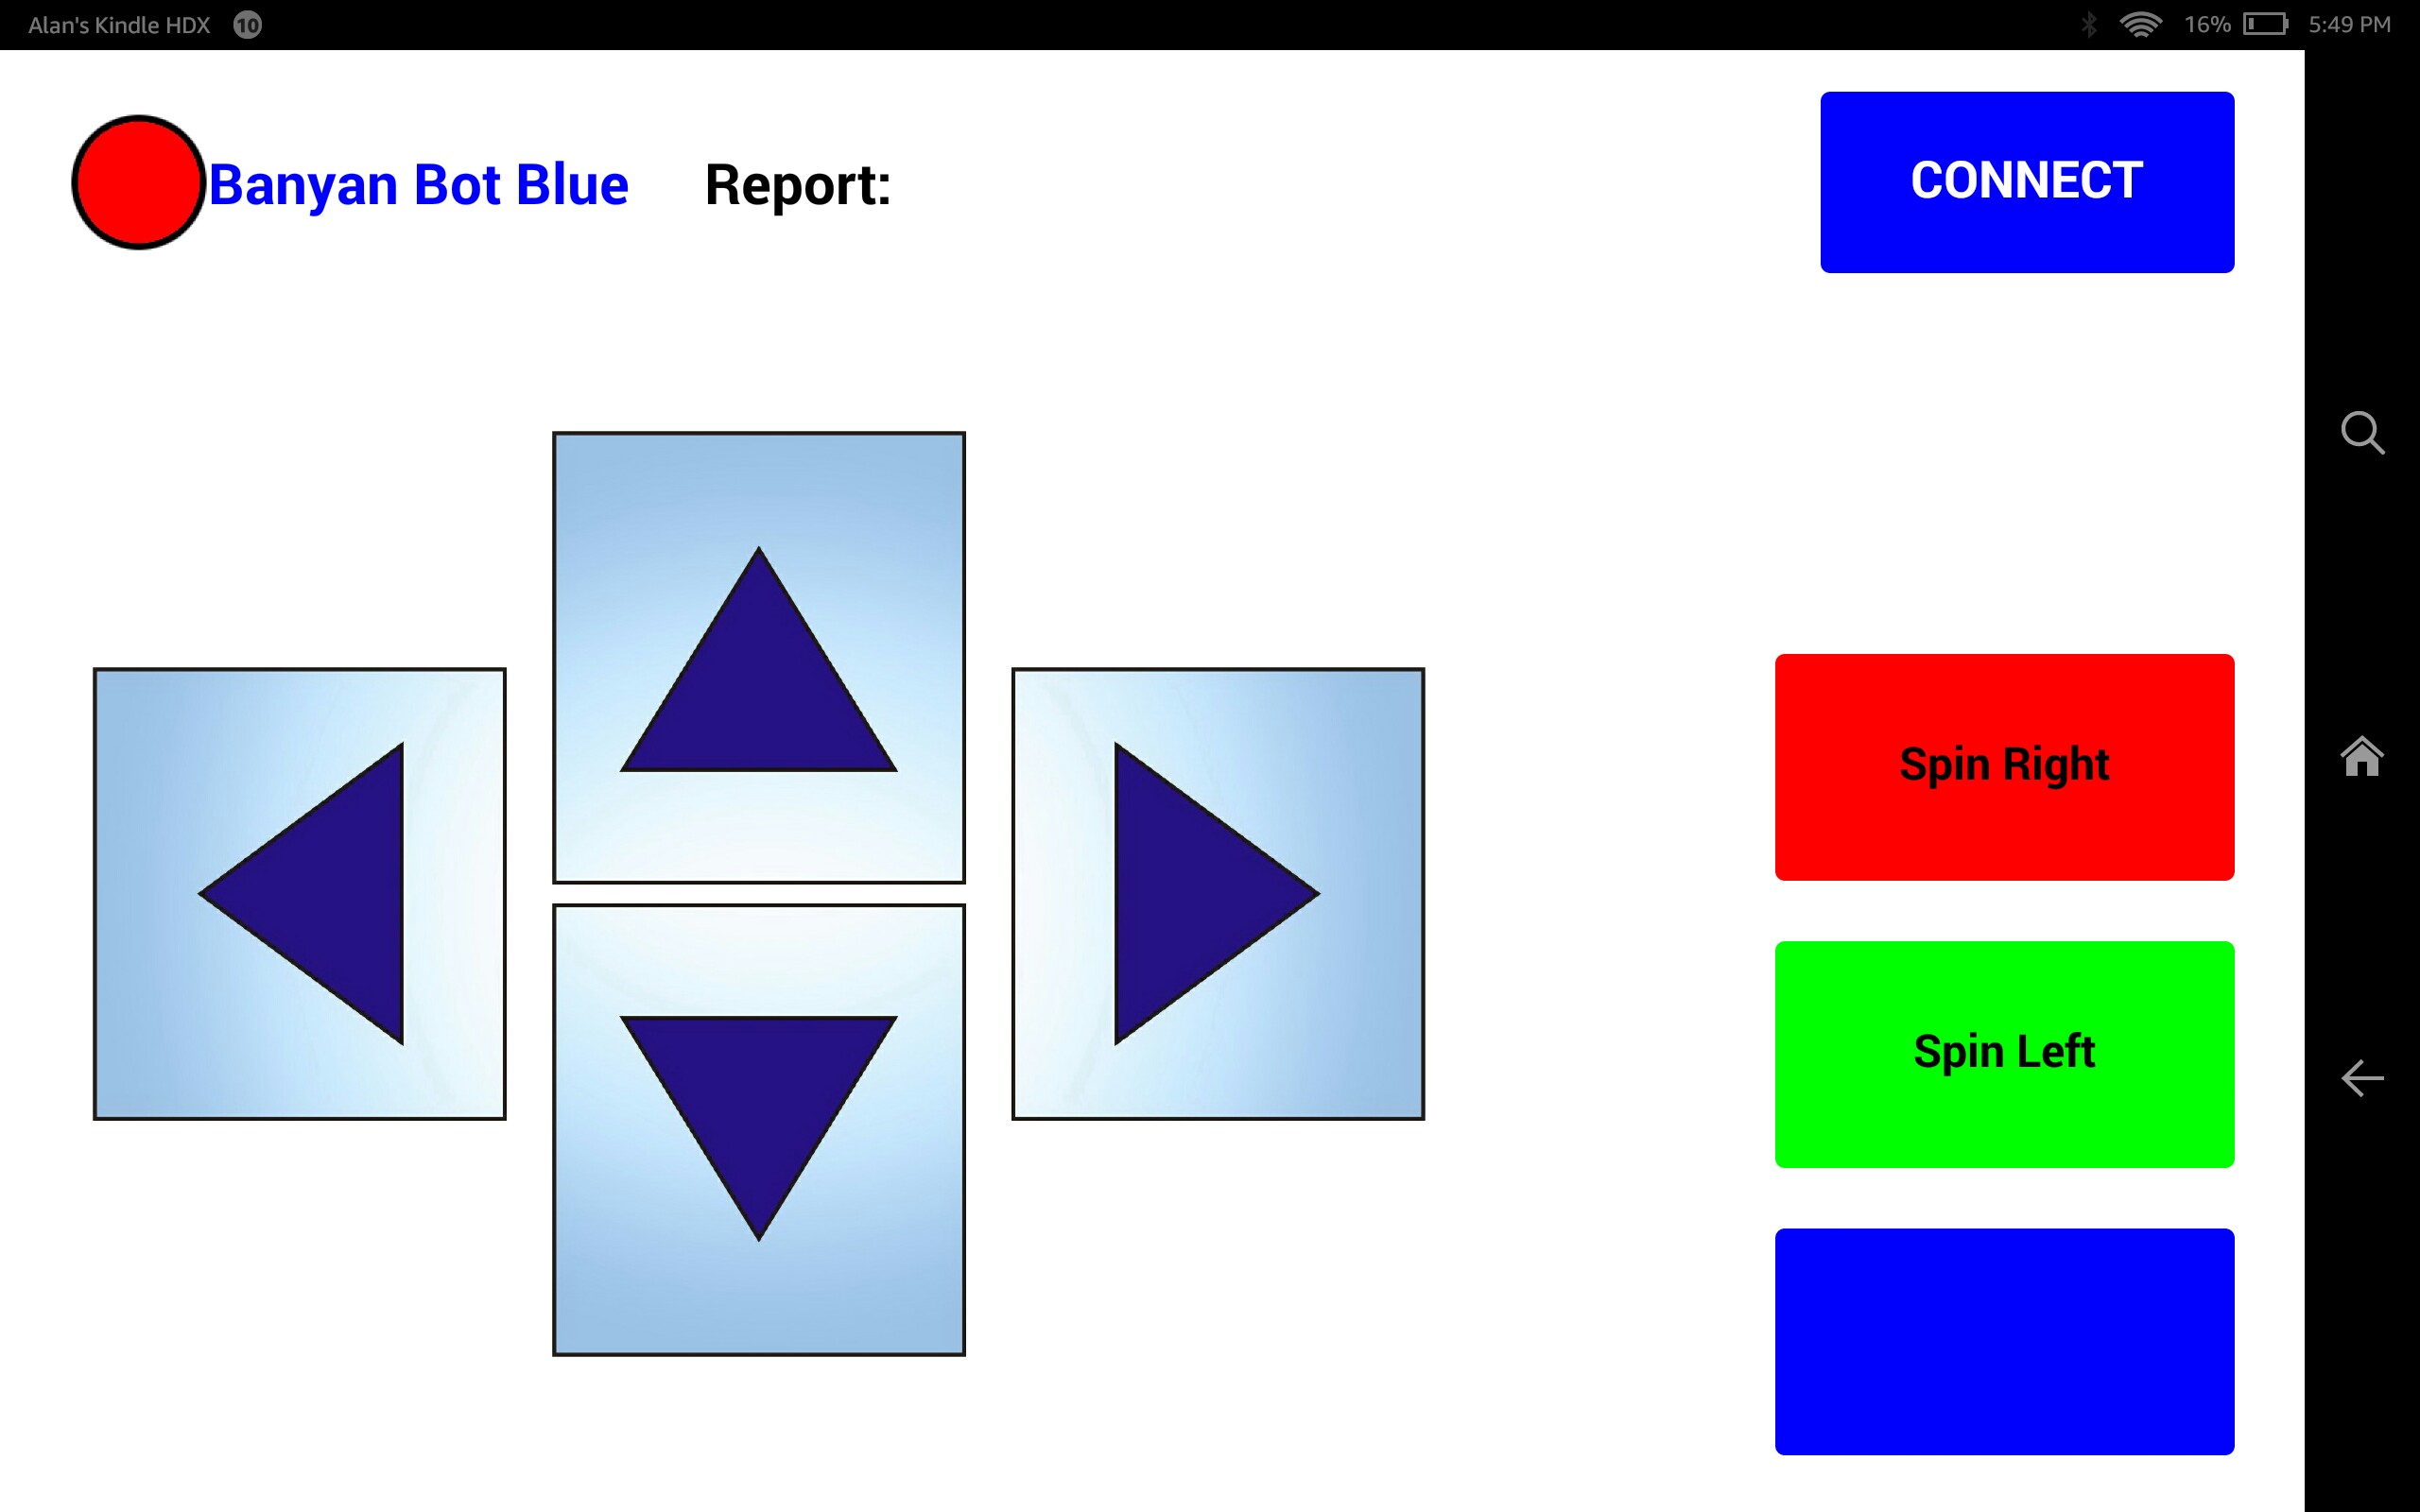
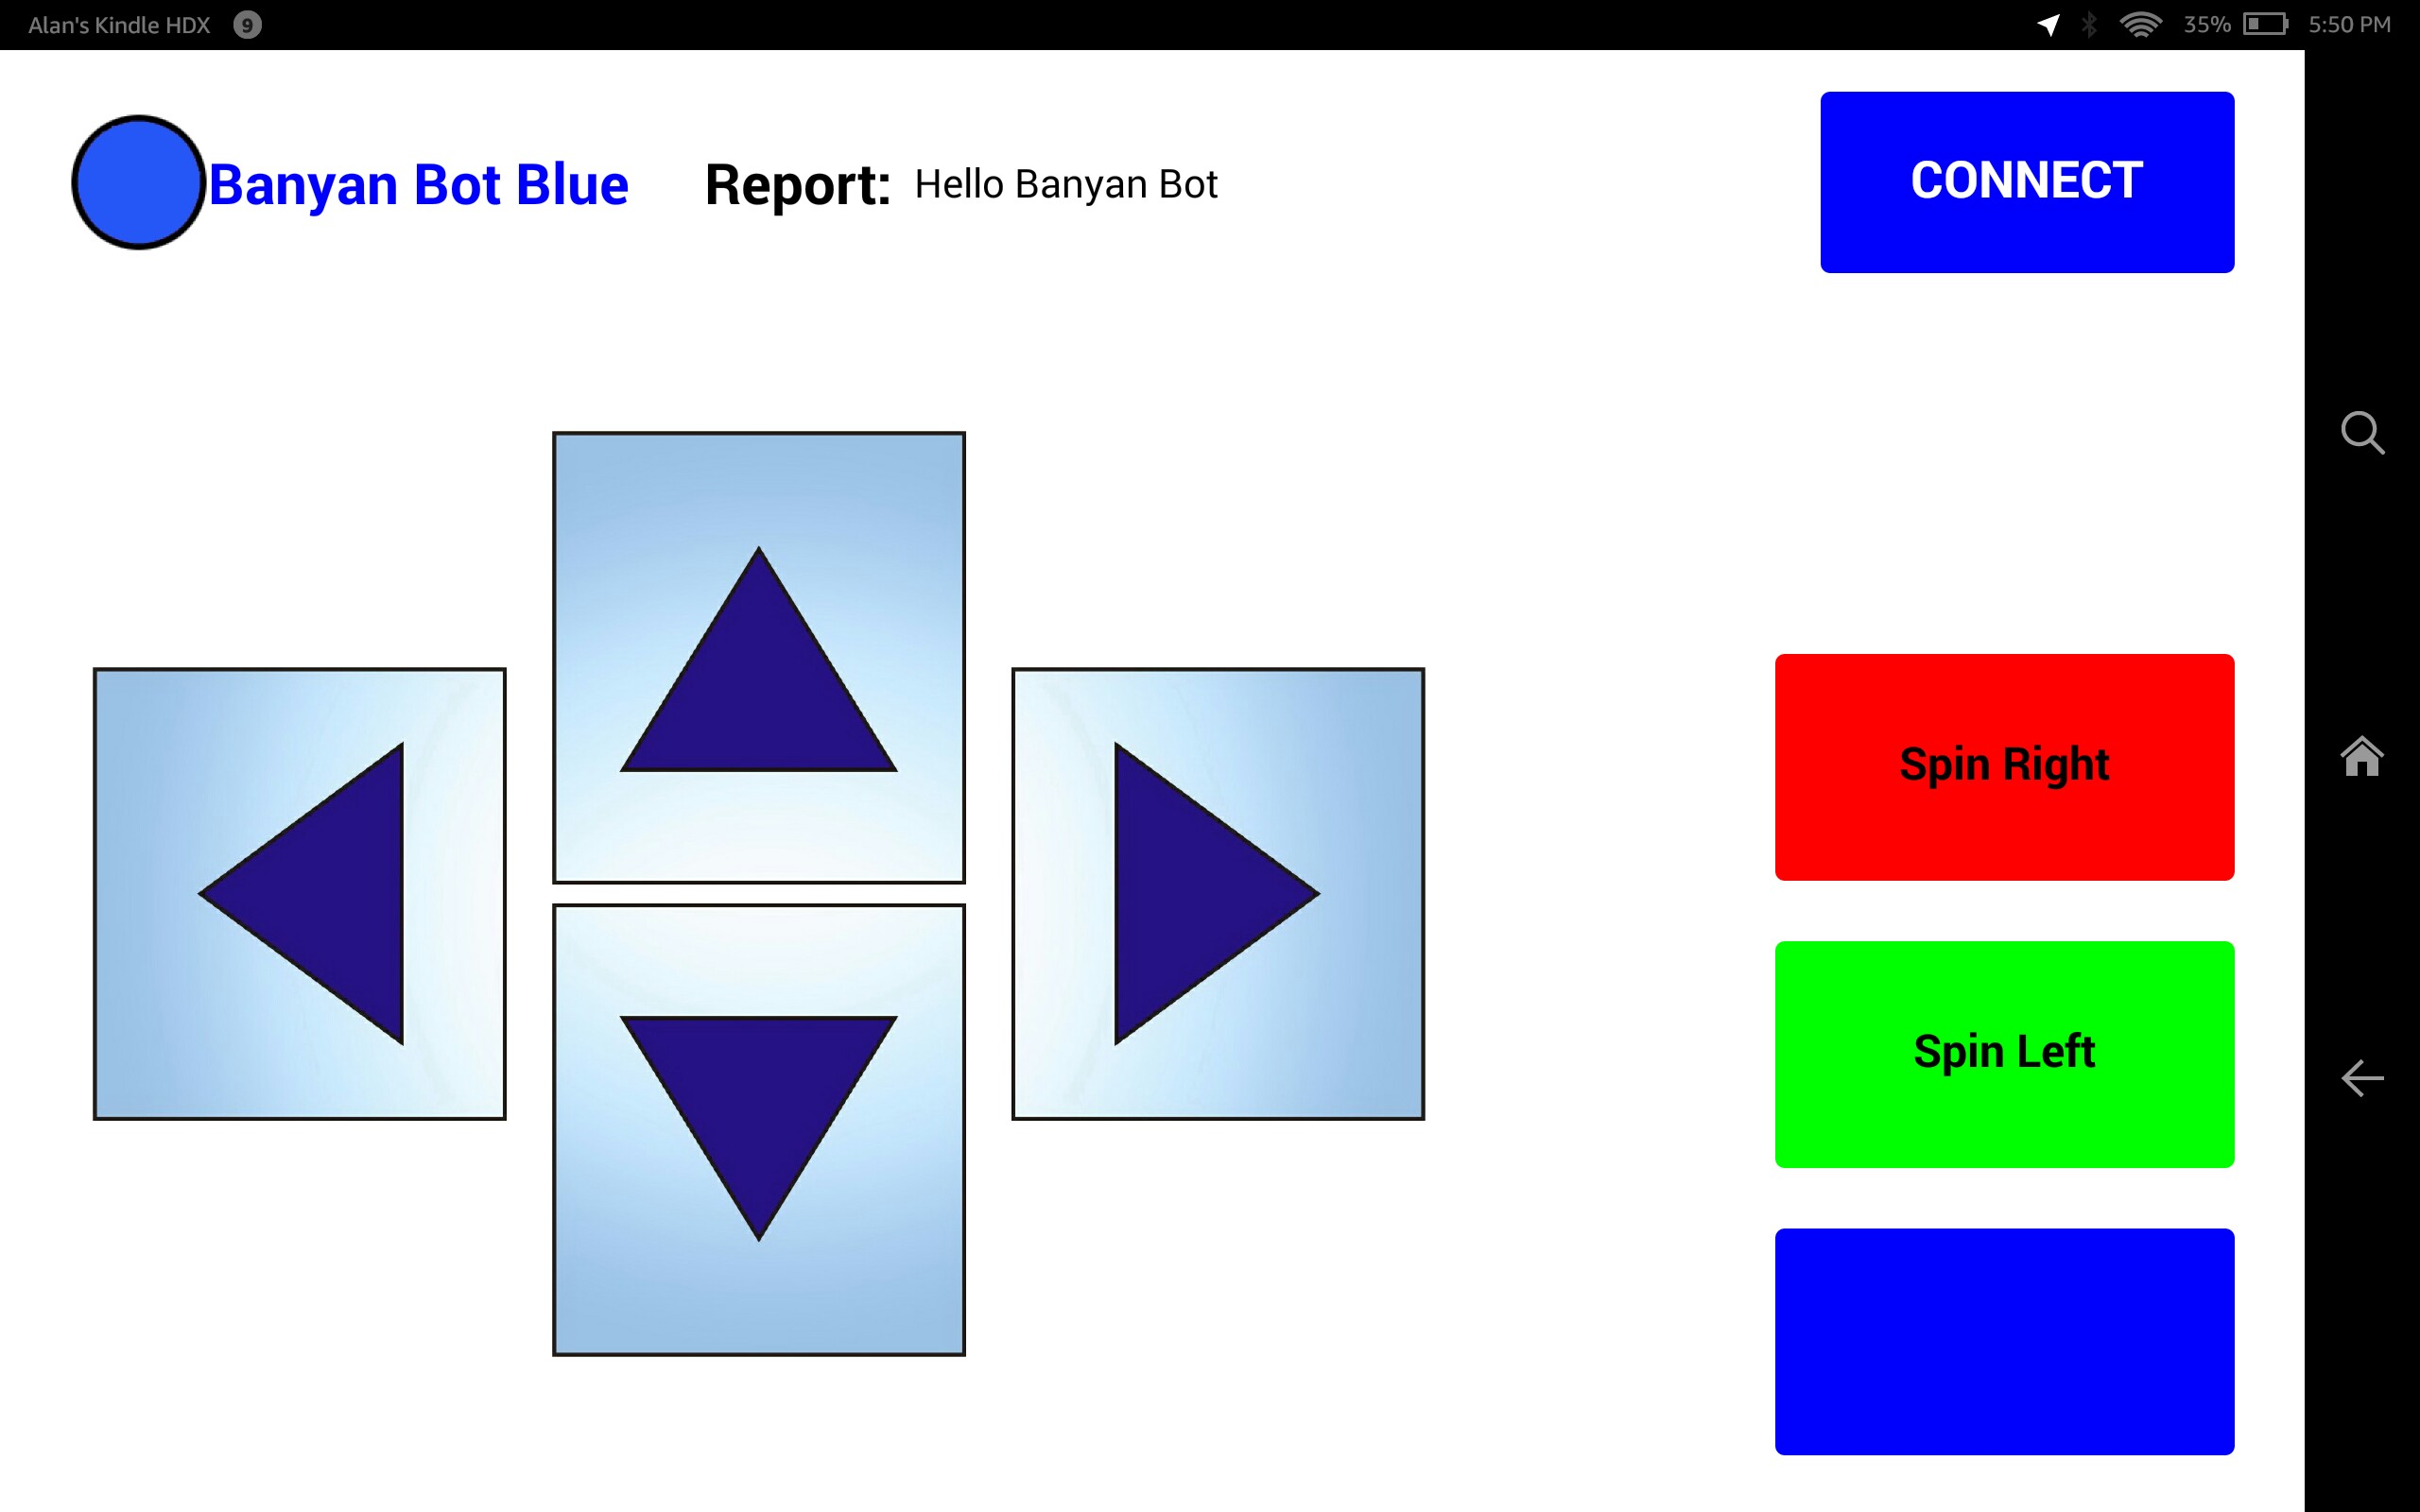
I have retained the concept of upper and lower case commands, however, I changed the command values for the red and green buttons and changed the name of the button displayed.
For the red button, I changed the command from ‘R’ and ‘r’ to ‘S’ and ‘s’. I also changed the display text from One to Spin Right
Similarly for the green button, I changed the command from ‘G’ and ‘g’ to ‘W’ and ‘w’. I also changed the display text from Two to Spin Left
For the blue button, I only removed the display text, since we will not be using this button for this project.
Here is a summary of button actions and the data generated for each action.
| Button | Pressed | Released |
|---|---|---|
| Up | ‘U’ | ‘u’ |
| Down | ‘D’ | ‘d’ |
| Left | ‘L’ | ‘l’ |
| Right | ‘R’ | ‘r’ |
| Spin Left | ‘S’ | ’s’ |
| Spin Right | ‘W’ | ‘w’ |
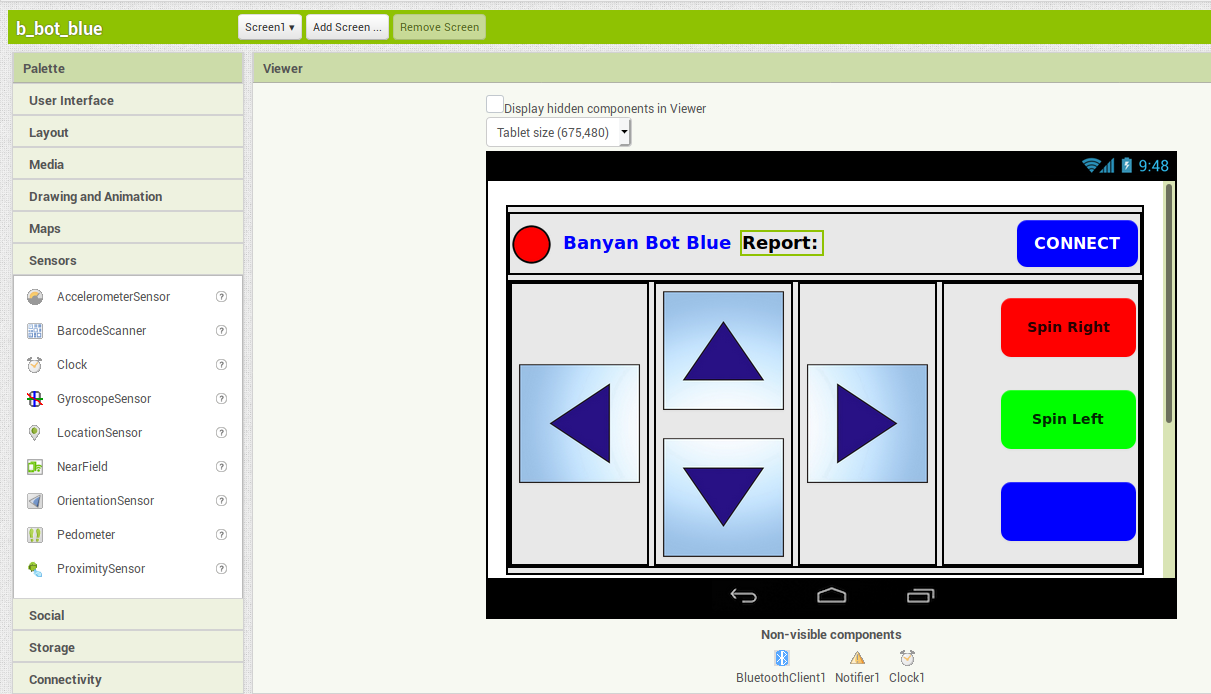
In addition to the button changes, I’ve also added a screen widget to receive and display data sent from the Raspberry Pi. This feature was added to demonstrate that two-way communication is possible between client and server over Bluetooth.
If you look at the modified screen below, you will see that a Report: label was added to the screen. When data is received, it will be displayed next to this label.
And finally, I changed the title of the app to Banyan Bot Blue.
The details of these changes are explained in a section at the bottom of this post.
Before looking at the details of the changes, let’s first load and use the app.
Running The App On Your Android Device
Getting The Code
When working with App Inventor, you can save your project to a file that will have a .aia extension. This file may be loaded into App Inventor if you wish to view or modify the project.
App Inventor also allows you to create a .apk file, which is an Android executable allowing you to run the app on your device.
Both the project file, b_bot_blue.aia, and the app, b_bot_blue.apk, are available for download on Github.
Loading The Modified APK Into Your Android Device
To run b_bot_blue.apk on your Android device, you will need to sideload it. Here are general instructions on how to do so, but you might want to search for instructions for your specific device.
Testing The App With The BlueTooth Test Server
Step 1
Follow the instructions from this previous post, to pair your Raspberry Pi to your Android device and to enable your Raspberry Pi for serial communications over Bluetooth.
Step 2
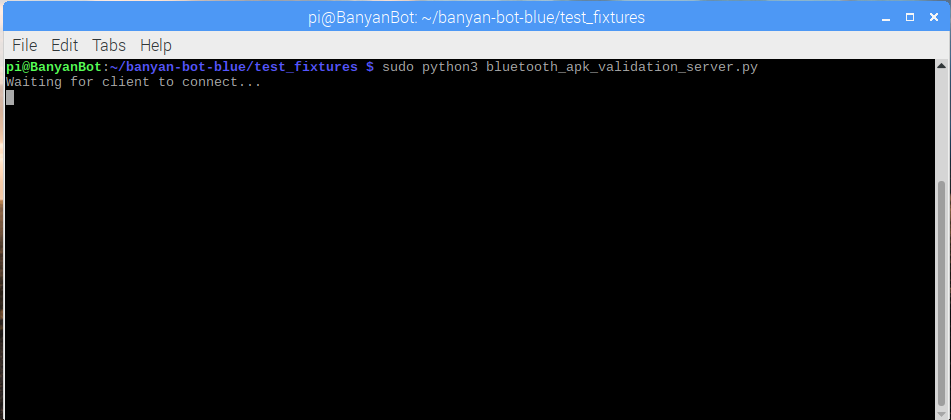
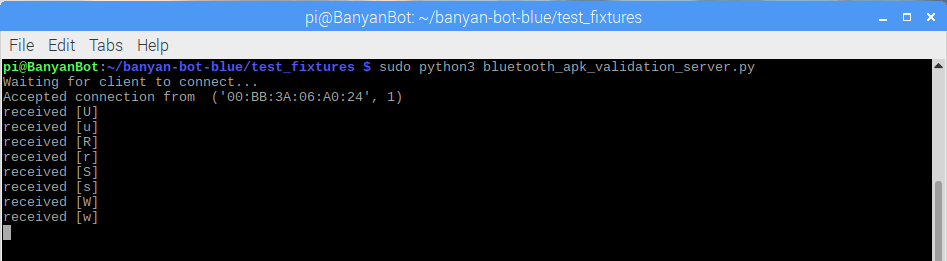
Launch the Bluetooth Test Server on your Raspberry Pi with the following command:
sudo python3 bluetooth_apk_validation_server.py
Step 3
Launch the Android app on your Android device.
Step 4
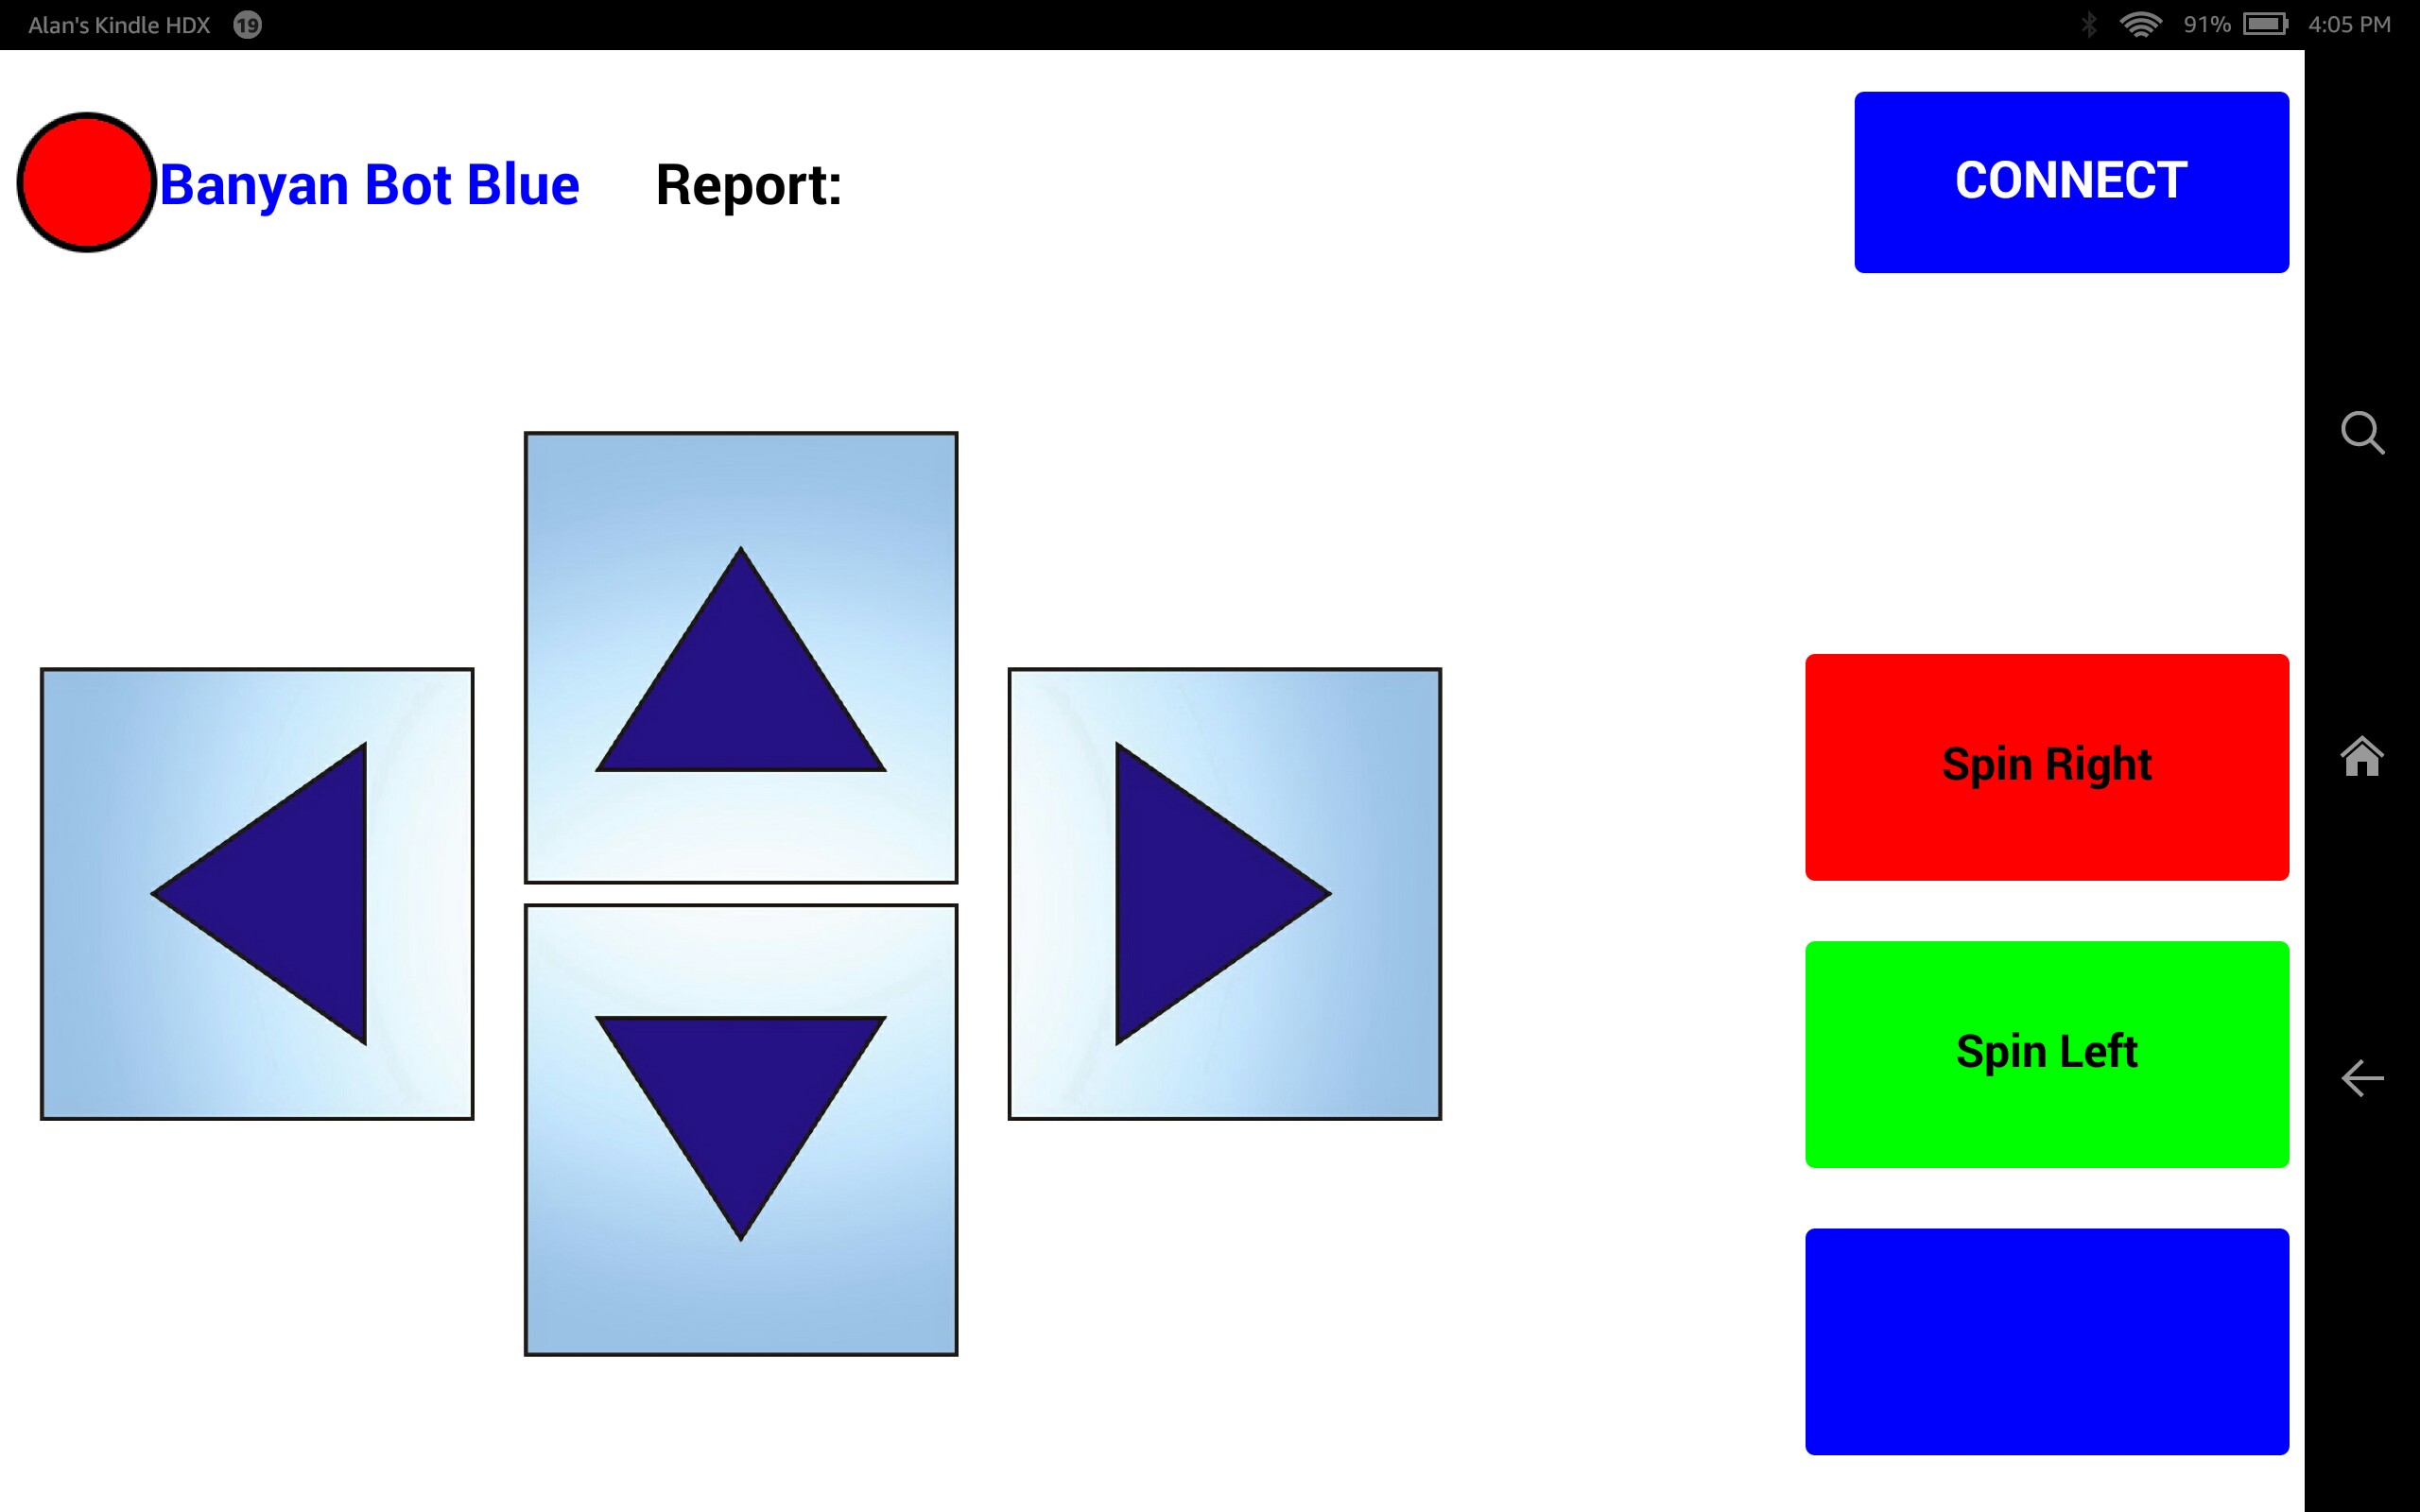
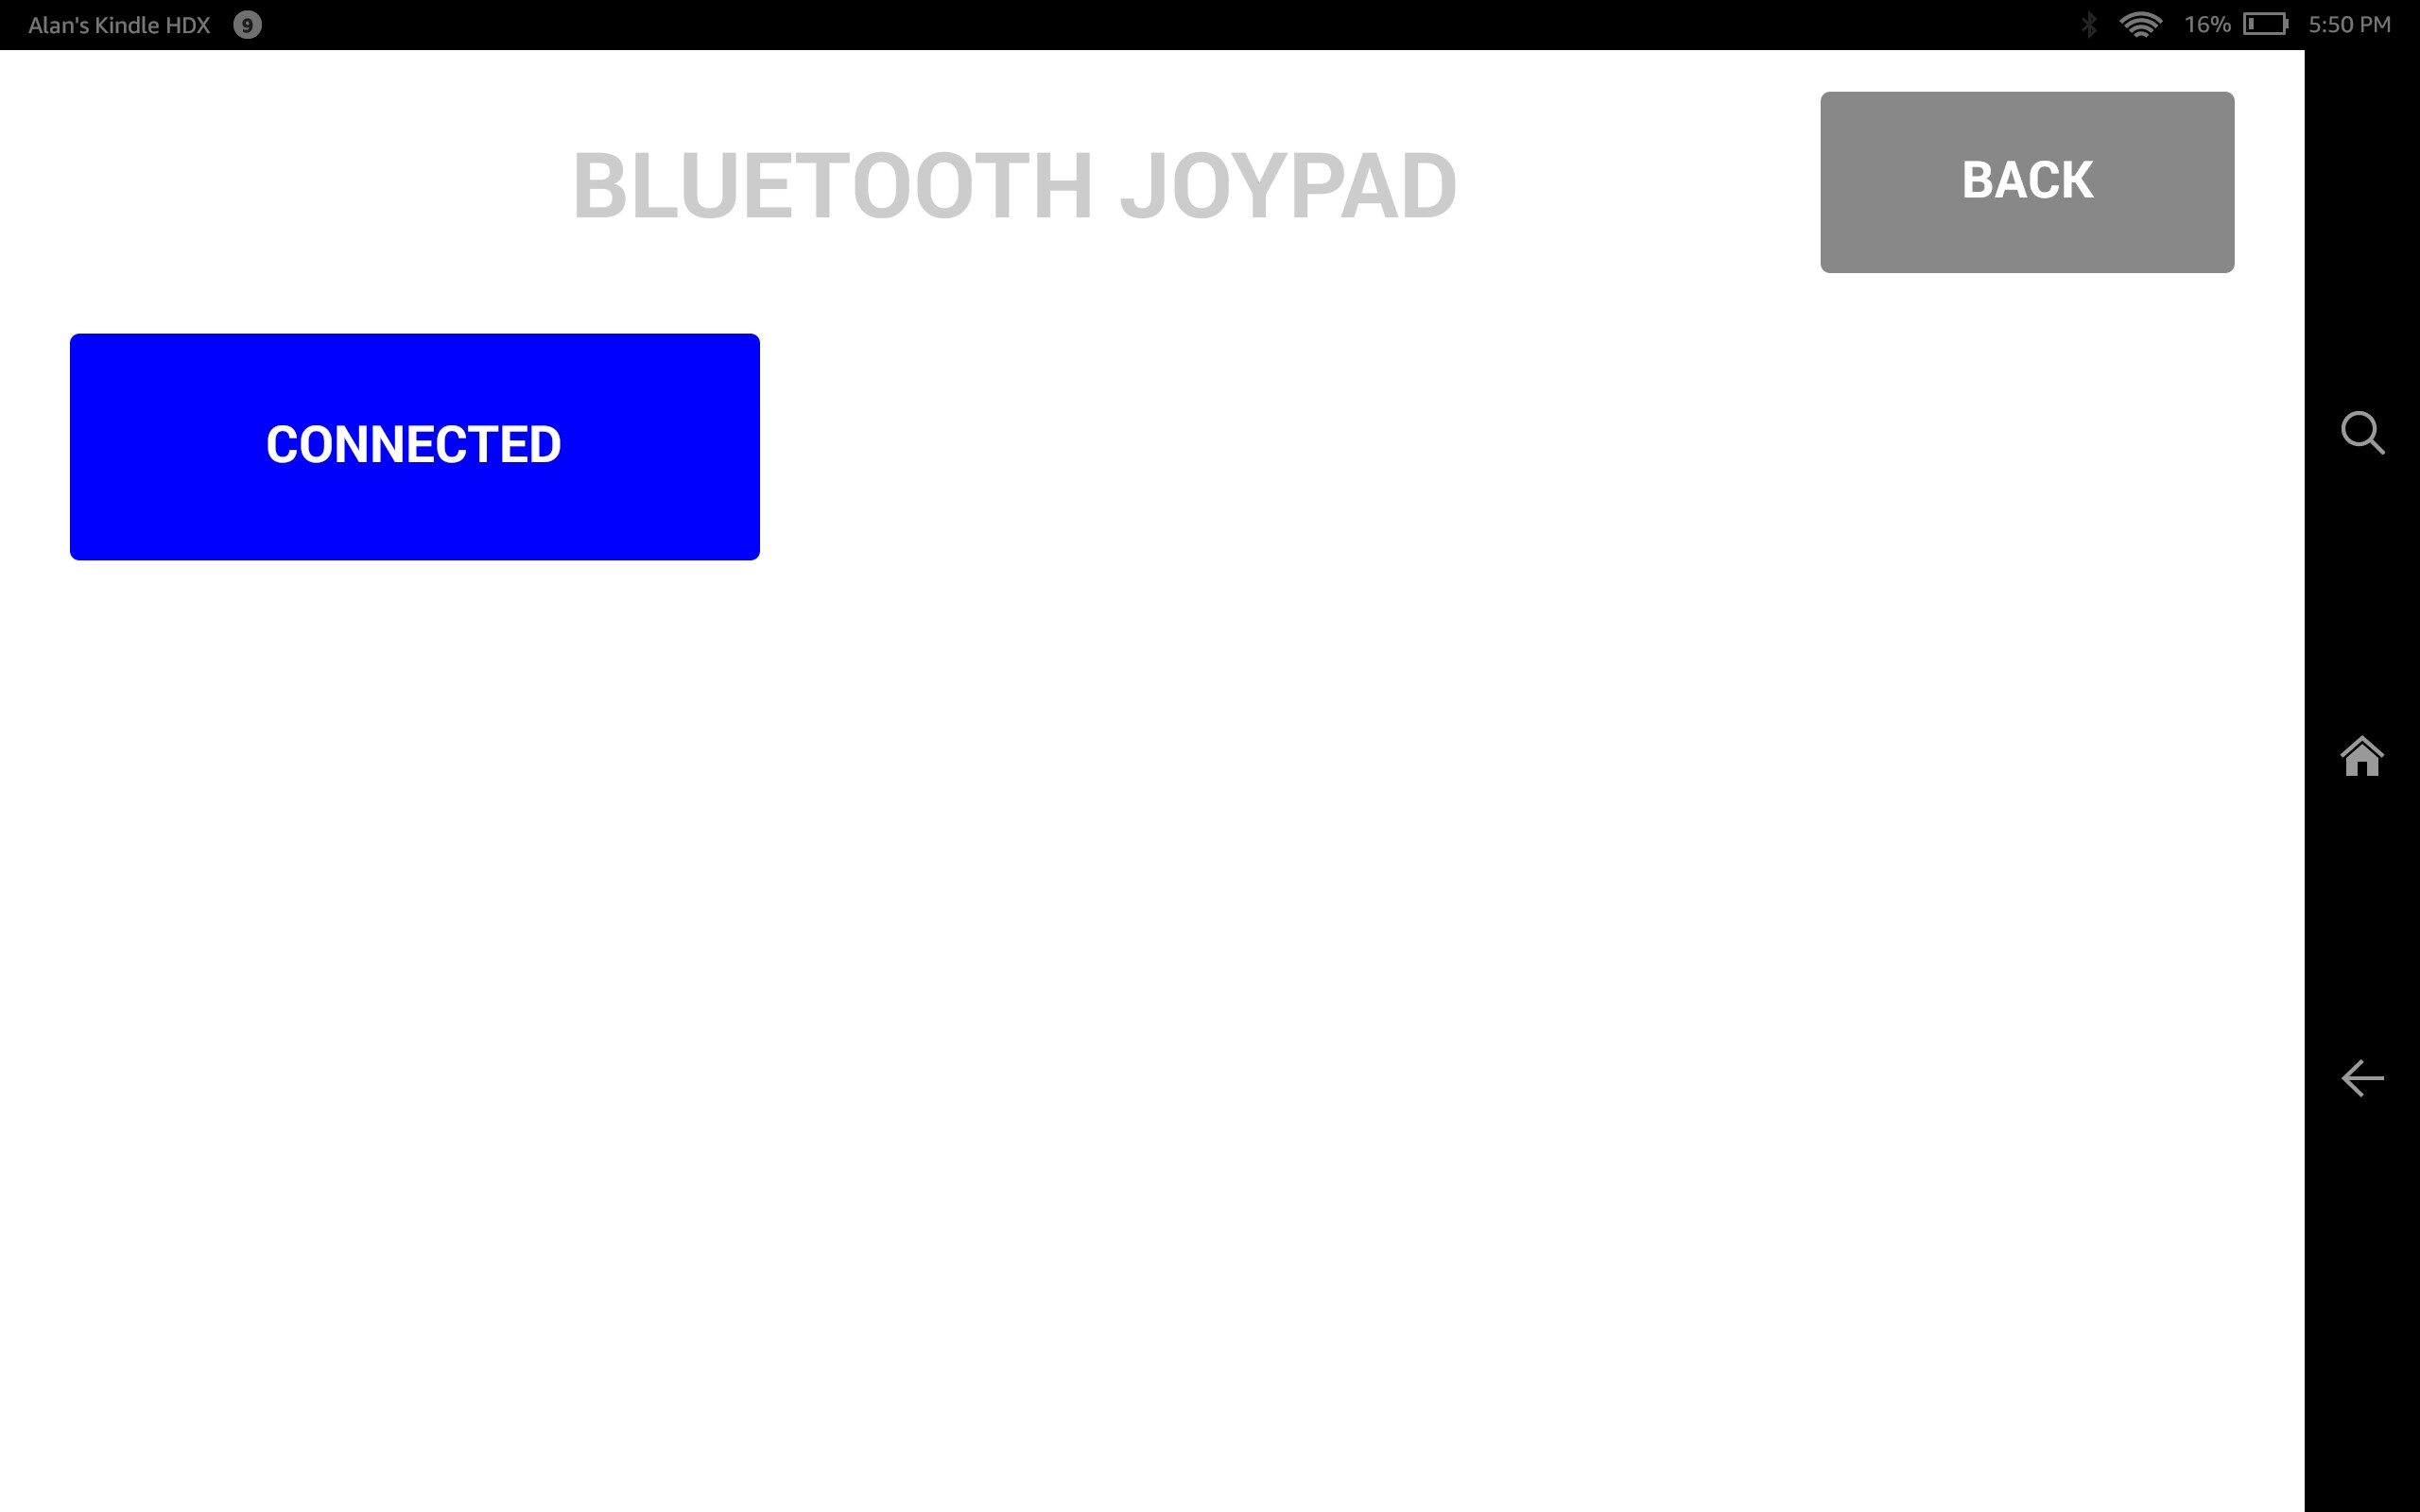
Connect the app by pressing the blue Connect button on the upper right corner of the Android app. This will bring you to a Connection Screen. It will say NOT CONNECTED

Step 5
Press the blue NOT CONNECTED button on the android device. This will bring up a screen to allow you to select a device to connect to. Select the Raspberry Pi that was paired earlier from the list of devices.

Step 6
The connection screen should now show that the device is connected. Press the gray BACK button.
Step 7
You are now ready to use the app. Notice that the dot in the upper left-hand corner turned from red to blue, indicating that you are connected. Notice that the Report is no longer blank, but says Hello Banyan Bot. This string was sent from the Bluetooth server on the Raspberry Pi.
Step 8
Press the buttons on the app, and look at the console on the Raspberry Pi. You should the button commands printed to the console.
The following sections describe the details of the changes that I made to the original app.
Understanding The App Inventor Changes Made To The Original App
Loading The Project Into App Inventor
First, download b_bot_blue.aia. Next, in App Inventor, select Projects from the menu and click on Import project(.aia) from my computer…
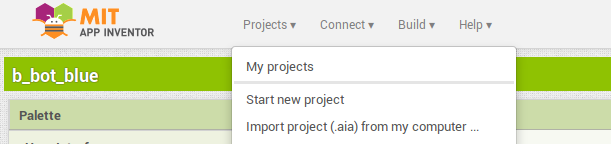
A file-chooser dialog will appear. Select the .aia file to load into the editor.
Designer Changes
The App Inventor Editor has 2 modes, Designer and Blocks. You select the mode by clicking on either of the buttons located on the top right of the editor.

Here are the design changes I made:
- Changed the title label text from Bluetooth Joypad to Banyan Bot Blue.
- Changed the button text for the Red and Green buttons.
- Removed the button text for the Blue button.
- Added a Report: label next to the title label.
- Added an empty label that will display incoming data.
- Added the non-visible timer sensor widget.
Changing The Properties of A GUI Widget
If you click on any widget that you’ve dragged into the Designer editor, a Properties menu for that widget will appear on the right side of the editor.
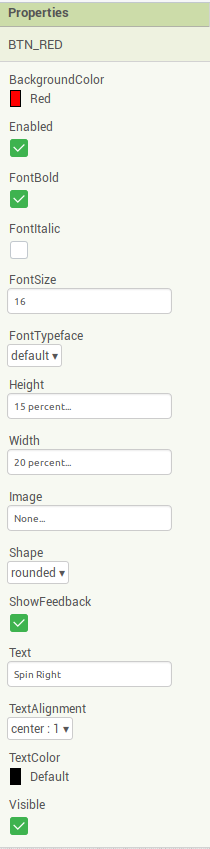
Using the properties editor, you can change the look and feel of a widget. In the screenshot above, the red button was selected and the text for the button was changed to Spin Right.
Adding New Widgets
To add a widget, select a widget from the User Interface palette.
Drag and drop the widget onto the Viewer section of the editor depicting your design. You will see a new component added to the components window of the editor.
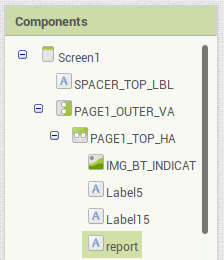
For this project, the report component is a label that will contain data received from the RPi. The Label15 component is the label that contains the text Report:.
In general, when making changes to the original project I did not rename the widgets.
Adding The Clock Sensor Widget
To receive data from the Raspberry Pi, we need to add the non-visible clock widget to our design. To do this, select Sensors from the Palette menu on the left side of the editor, and then drag the clock to the center of the editor. You should see the clock added to the list of non-visible components just below your screen design.
Modified App Inventor Code Blocks
To change the behavior of a widget, we need to interact with the code blocks. To do this, select Blocks in the upper right of the App Inventor Editor.
Let’s look at the blocks for the red, green and blue buttons. Below you will see the original blocks and the modified blocks for these buttons. The command values were changed to meet our needs.
Original Blocks For The Buttons
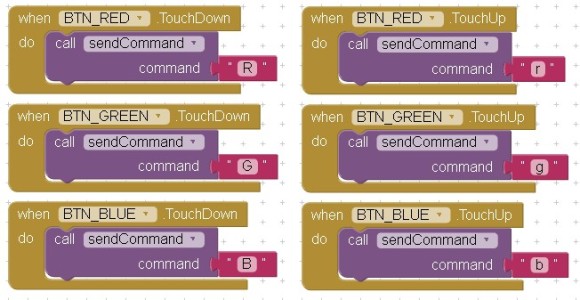
Original Commands
Modified Blocks for The Buttons
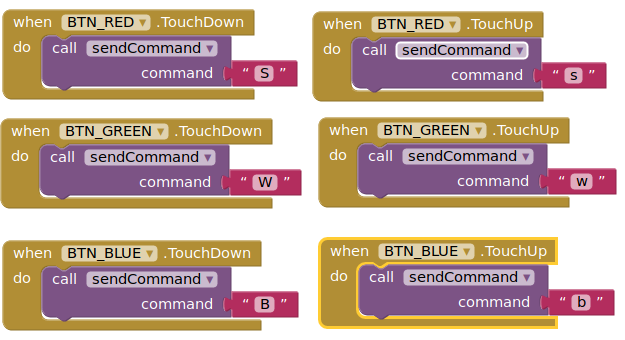
Modified Commands
New Blocks To Receive and Display Data
To receive data, we need to add some code. The blocks below show how to receive data from the Raspberry Pi and print the data to the Report section of the app.

Blocks Added To Receive Incoming Data
Coming Up In The Next Post
Now that we have an Android app loaded and ready to go, in the next post, we will start building Banyan components to translate the Android commands into motor actions.